With the release of Kubernetes 1.14, it was discovered that the Yaml management tool kustomize, which was only for the Kube interest group, was integrated into kubectl, so that you can use kubectl apply -k to apply kustomization.yaml from the specified directory to the cluster.
What is kustomize
Using the tool definitely starts with figuring out where the tool is located. kustomize (Github link) is described in the code repository as.
Customization of kubernetes YAML configurations
kustomize is clearly a solution to the problem of kubernetes yaml application management, however, for 9102, Helm is definitely on the mind when it comes to Kube Yaml management, so how kustomize solves the management problem, how it differs from helm, and what trade-offs we should make are the issues we will discuss below.
How it works
kustomize defines a K8s application as a resource description represented by Yaml, and changes to the K8s application can be mapped to changes to Yaml. These changes can be managed using a version control program such as git, so users can use a git-style process to manage K8s applications.
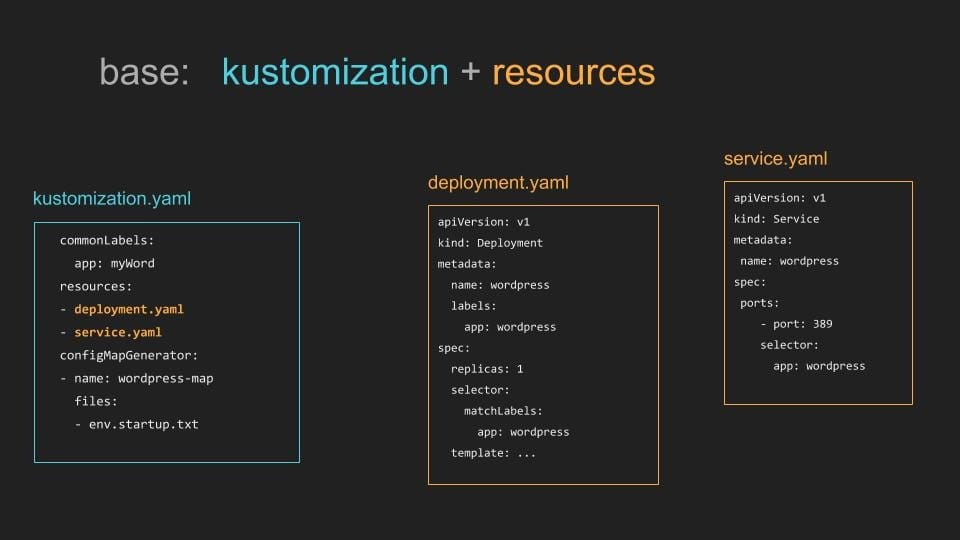
For a kustomize managed app, there are several Yaml’s. A demo directory structure is described in Github as follows
It contains kustomization.yaml, which describes the metadata, and two resource files, the contents of which are shown in the figure below.

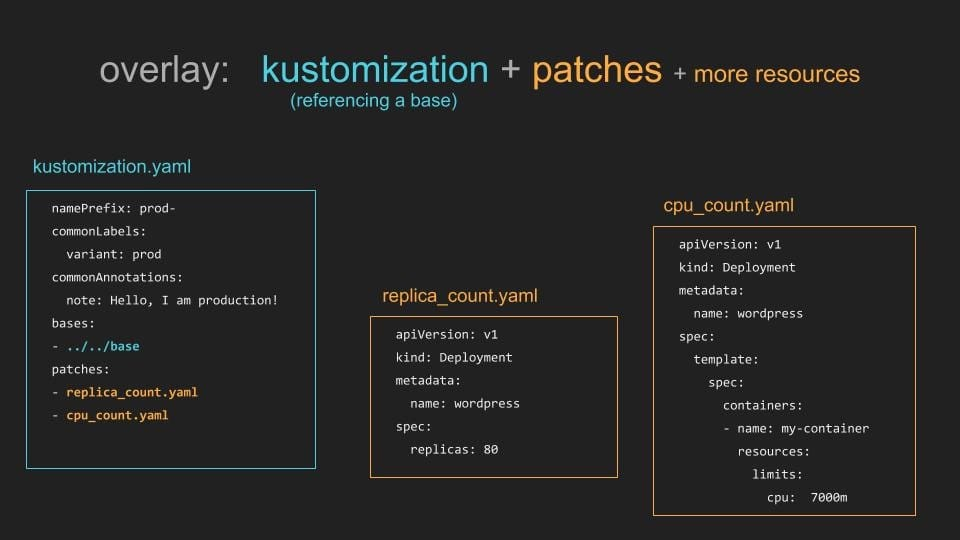
The Yaml in this directory is incomplete and can be supplemented or overwritten, so the Yaml is called Base, and the Yaml supplementing Base is called Overlay, which can be supplemented with overlay yaml for different environments and scenarios to make the K8s application description more complete, and its directory structure is.

kustomize generates the complete deployment Yaml by overlaying the description file, which can be generated and deployed directly using the build command.
|
|
After Kubernetes 1.14, direct apply of the application is also supported.
|
|
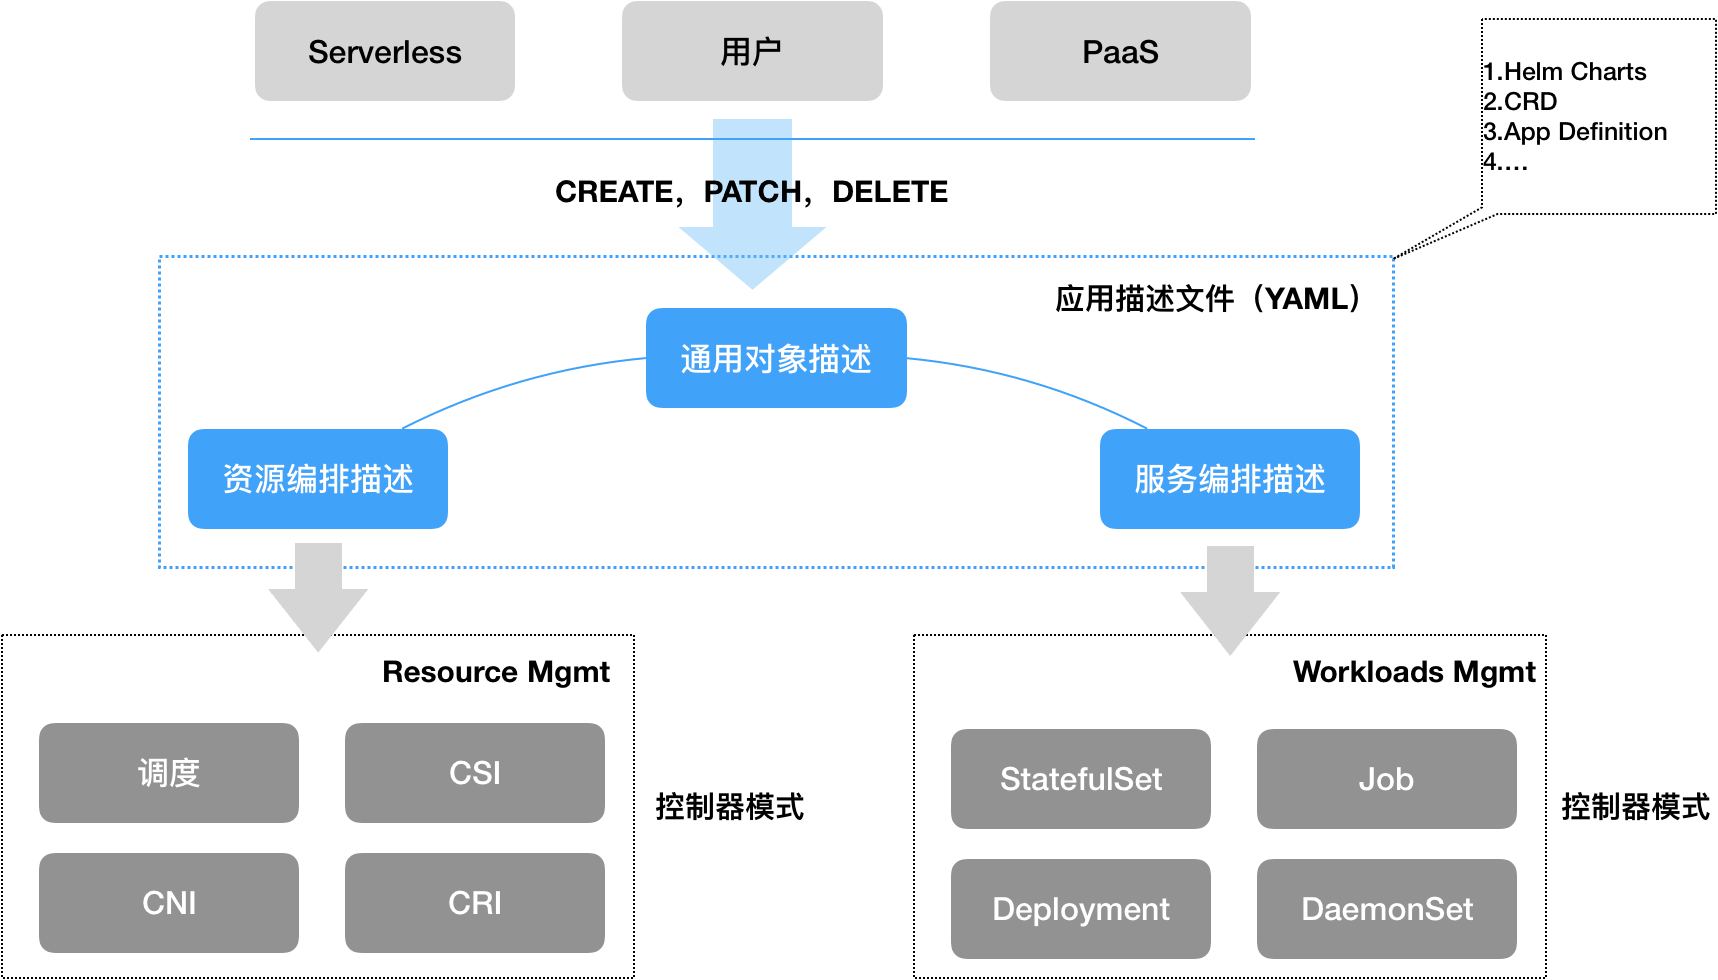
In the Kubernetes application management system, the application’s descriptor (Yaml) is a core component that allows users to declare their application’s resource and service orchestration requirements to the cluster, and kustomize is an important attempt by the community to manage the descriptor.

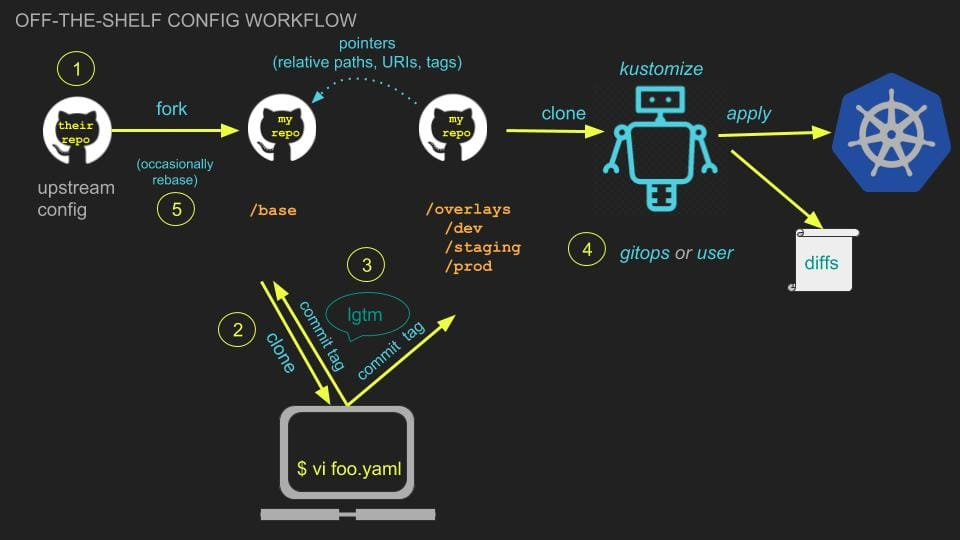
For kustomize, you can use Git to manage Kubernetes apps, fork existing apps, extend the Base, or customize the overlay, with the following basic process.

A full workflow document is available in the official Github repository: https://github.com/kubernetes-sigs/kustomize/blob/master/docs/zh/workflows.md
Comparison with Helm
By understanding how kustomize works, we can see that the most intuitive difference between Helm and Helm is in Yaml rendering. Helm renders at deployment time by writing Yaml templates, while kustomize is an overlay overlay, creating different patches and choosing to use them at deployment time.
But more importantly, Helm and kustomize are working on different problems. Helm is trying to be a self-proclaimed ecosystem that can easily manage the application artifacts (image + configuration), while for a released artifact, Chart is relatively fixed, stable, and a static management that is more suitable for external delivery. This is not the case with kustomize. kustomize manages applications that are changing, and can fork out a new version at any time, or create a new overlay to push the application to a new environment, which is a dynamic management, and this dynamic is very suitable for integration into the DevOps process.
Installation
The installation of kustomize is very simple, as it is just a cli itself with one binary file, which can be downloaded from the release page: https://github.com/kubernetes-sigs/kustomize/releases
Managing K8s applications with kustomize
Let’s create a web application from scratch and deploy it with kustomize with different configurations for development, test, and production environments. The full demo can be found on Github: https://github.com/Coderhypo/kustomize-demo
First create a base folder in the application root directory as the base yaml management directory and write kustomization.yaml in it:
For an example of how to write this Yaml, check out the official example at https://github.com/kubernetes-sigs/kustomize/blob/master/docs/zh/kustomization.yaml.
A simple Deployment and Service Yaml file is then generated based on the 2048 image.
This gives us the most basic application Yaml, then we create the overlays folder in the root of the application for adding overlays, and we design three scenarios below.
- development environment: we need to use nodeport to expose the service and add DEBUG=1 environment variable in the container
- test environment: you need to use nodeport to expose the service, add the environment variable TEST=1 in the container, and configure the CPU and Mem resource limits. 3. production environment: you need to use nodeport to expose the service, and add the environment variable TEST=1 in the container.
- production environment: you need to use nodeport to expose the service, add PROD=1 environment variable in the container, create a configmap named pord, hook it into the container as an environment variable, and configure the resource limits of CPU and Mem
Development environment
Create a dev directory in the overlays directory, and add kustomization.yaml.
In nodeport_patch.yaml, make the following changes to the Service.
Make changes to the containers in Deployment in env_patch.yaml.
Deployment of the development environment.
|
|
Test environment
The test environment can be further modified based on the development environment, we can copy the configuration of the development environment directly.
|
|
Then modify env_patch.yaml, change DEBUG to, TEST, and add a new yaml to kustomization.yaml.
Add resource restrictions to resource_patch.yaml.
Deployed in a test environment.
|
|
Production environment
The production environment can be modified based on the test environment by copying as above and editing the kustomization.yaml file.
Unlike before, configmap does not exist in base, so it needs to be added as a new resource by writing a description of configmap in config.yaml.
Add the use of configmap to env_patch.yaml.
Deployment of production environment applications.
|
|