A container acts as an instance of a image, a runtime for stateless applications in the images. Stateless is so-called because the lifecycle of a container is very flexible. When a container’s lifecycle ends, the data generated during that time does not persist, but is removed with the deletion of the container. However, most applications are for data now, so the persistence of containers is explored here.
Storage for containers
Before we discuss container persistence, let’s explore what data storage looks like without persistence, i.e. a normal container.
Let’s run a container.
Because a container is also a process by nature, then all the files generated within the container must also be stored on the host in some way, and we can exec into this container and create a file.
Once created, this file can be found under /var/lib/docker/aufs/mnt.
And going in and finding this path /var/lib/docker/aufs/mnt/24c7a79f3a3bcb9320e028dab081eec7f55a5a8fb8eb2201d9cfe7b1d9d0e7bf will reveal that this is the entire filesystem under the container.
If you try to create a number of files in this directory under the host, you will find them in the container as well.
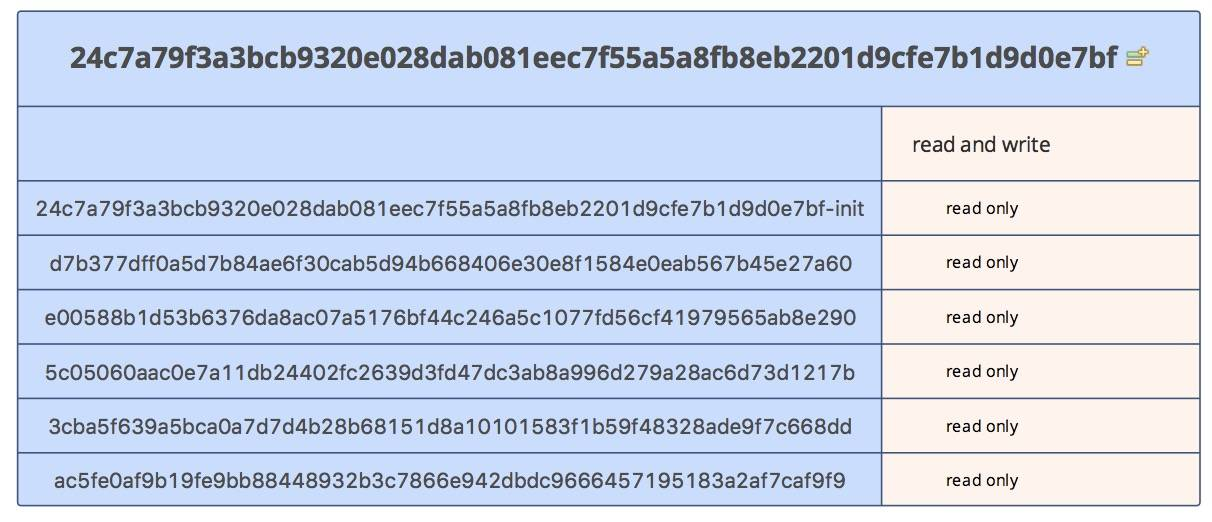
The principle of this is simple and can be found under /var/lib/docker/aufs/layers.
|
|
As you know, images are stored in layers, and containers are simply layers of images with an additional read/write layer on top for data storage.

Therefore, it is clear that the container storage is nothing more than a mapping of the files inside the container to a certain directory on the host, which is this layer of readable and writable layers. however, when the life cycle of the container ends, this host folder also ceases to exist.
For this reason, we need to consider how to persist the data generated by the container.
Persistence and Volume
There are two ways to persist container-generated data, which are basically two completely different ideas. The first is to persist the temporary layer through docker commit, which is the same as the container’s lifecycle.
In this way, the layer that already contains data is permanently stored in the newly generated image, and the data can be used again by instantiating a new image.
However, this has obvious limitations and does not meet runtime requirements, so we can consider the second persistence method, Volume.
Volume is also very simple to use, just add a -v parameter to run, and we will explore volume in three ways using the -v parameter.
The first way, which is the simplest, is to mount a volume directly to a container.
We run a container and mount it on a volume.
|
|
With the inspect command, we can see the volume information of this container.
|
|
We can see that docker mounts a file under local /var/lib/docker/volumes to the container’s /volume, a directory.
When we go to /var/lib/docker/aufs/mnt again to find the directory corresponding to the hit container and make changes in the directory /volume, the files in the container do not change much, however, the files in /var/lib/docker/volumes/ 8aa697c21e65e104dcb9f8b8507c905715d457ad88ee3c2e79a0c72ef07fff0e/_data, you can see the corresponding changes inside the container.
However, this time, although the use of volume, but in the end what is the difference with no use?
The difference is that the volume folder does not have the same life cycle as the container, but remains on the host after the container’s life cycle is over.
Then this satisfies the problem of persisting the data generated during the lifetime of the stateless container. However, there are still some inconveniences, such as the inconvenience of managing the volume and running another container to inherit the data generated by the previous container.
The second way satisfies this problem. The second way is to hook a directory of the host to the container.
We can run a container and mount the local /root/data directory to the /volume of the container.
We can still get volume-related information by using the inspect command.
At this point, it turns out that docker very frugally does not create a folder under volume, but directly creates /root/data, and then, mounts this folder directly to /volume inside the container.
The third way, instantiate a data volume container and then mount this data volume container on the newly created container.
While instantiating a data volume container, there are two ways mentioned above, and we can look at how each of the two different data volumes affects the newly created container.
We start by running a container and using the container containing the normal volume as the data volume container (see the first way above).
Then, take this container for inspecting.
|
|
We can see the same information as before, this container does not create any volume, but just reuses the volume of the data volume container.
Similarly, from a volume container created in the second way, we get a similar result.
The newly created container does not create a volume, but still directly uses the original container’s volume. Therefore, if multiple containers need to share a file directory, it is entirely possible for one container to create a volume, and then the other containers can use this volume by volume-from association.