How do we run only the unit tests for files that have changed before git commit?
As we move forward with EPC, unit testing is a necessary skill, and it’s important to run single tests before local Git commits, as you can’t put all the pressure of single tests on the pipeline.
After all, it costs a lot of money to run a single test in the pipeline, and it takes at least a few minutes to go from push to trigger the pipeline and perceive the results of the single test.
So we need to do some single-testing on git commit. But if we run all the single test cases before committing, it’s not necessary and it’s time consuming.
So how should we run a single test case for only the files that have changed?
1. Using husky and lint-staged
We’re going to use the husky and lint-staged components next to implement detection of change-only files before commit.
- husky allows us to easily set the hook for pre-commit.
- lint-staged component can fetch all the files that have changed since the last commit before Git commits them. we can use this feature to run jest.
1.1 Configuring husky and lint-staged
First let’s install and configure these two components.
After running the above 4 commands, then configure lint-staged in package.json.
The node-glob wildcard configuration is supported in lint-staged, as well as multiple configurations. If the path to the file where the change occurs satisfies the configuration, the subsequent command is triggered.
The above wildcard means: any file ending with .js or .jsx or .ts or .tsx in src directory at any path.
1.2 Configuring jest
We configured jest in the test:staged command above.
- bail: exit whenever a single test case that fails to run is encountered.
- findRelatedTests: detects the specified file path.
For other more parameters, you can directly consult the official documentation Jest CLI Options.
Many of the public data we can configure directly in jest.config.js
|
|
Once the above two configurations are completed, npm run test:staged will be executed when at least 1 of the files changed in this commit meet the requirements.
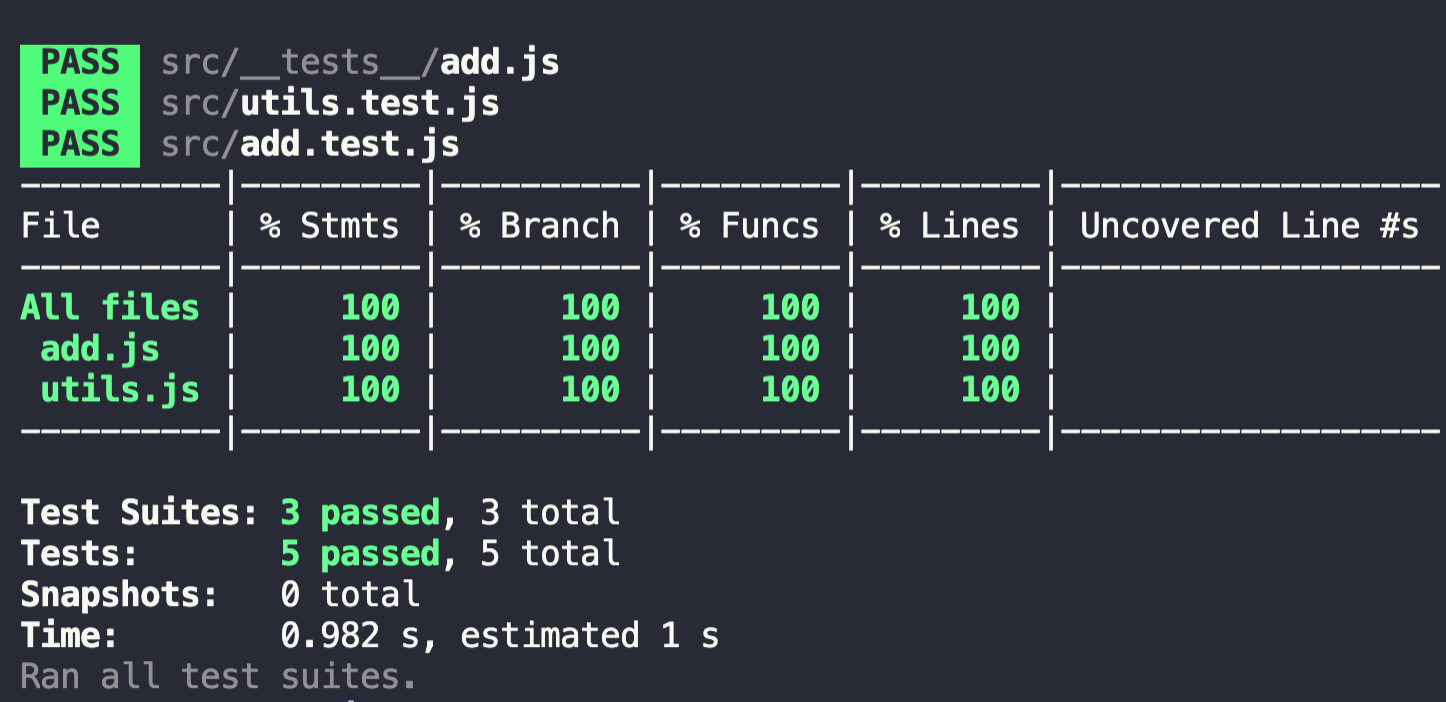
Let’s run all the test cases first.

As you can see, we actually have 2 source files and 3 test files. However, the add-related ones have already been committed in the last commit, so only uitils and utils.test have changed in this commit.
As you can see from the given test report, only the utils files that have changed are currently being detected.

2. Coverage requirements
We set the global coverage and the coverage of individual files above via the coverageThreshold property in jest.config.js.
We then add a few new files to the code, but do not configure the corresponding test files. Then the runtime finds that if there is no corresponding test file, the coverage of that file is not checked.
I purposely set the probability here to 100%, and then math.js has no corresponding test file.

From the results of the test run, only utils.js with the test file is detected here, and not math.js.
Here we need to add a new property collectCoverageFrom.
At this point, when we run the single test again, we will be able to include all the files that meet the requirements, in the coverage assessment.
3. The pitfalls of collectCoverageFrom
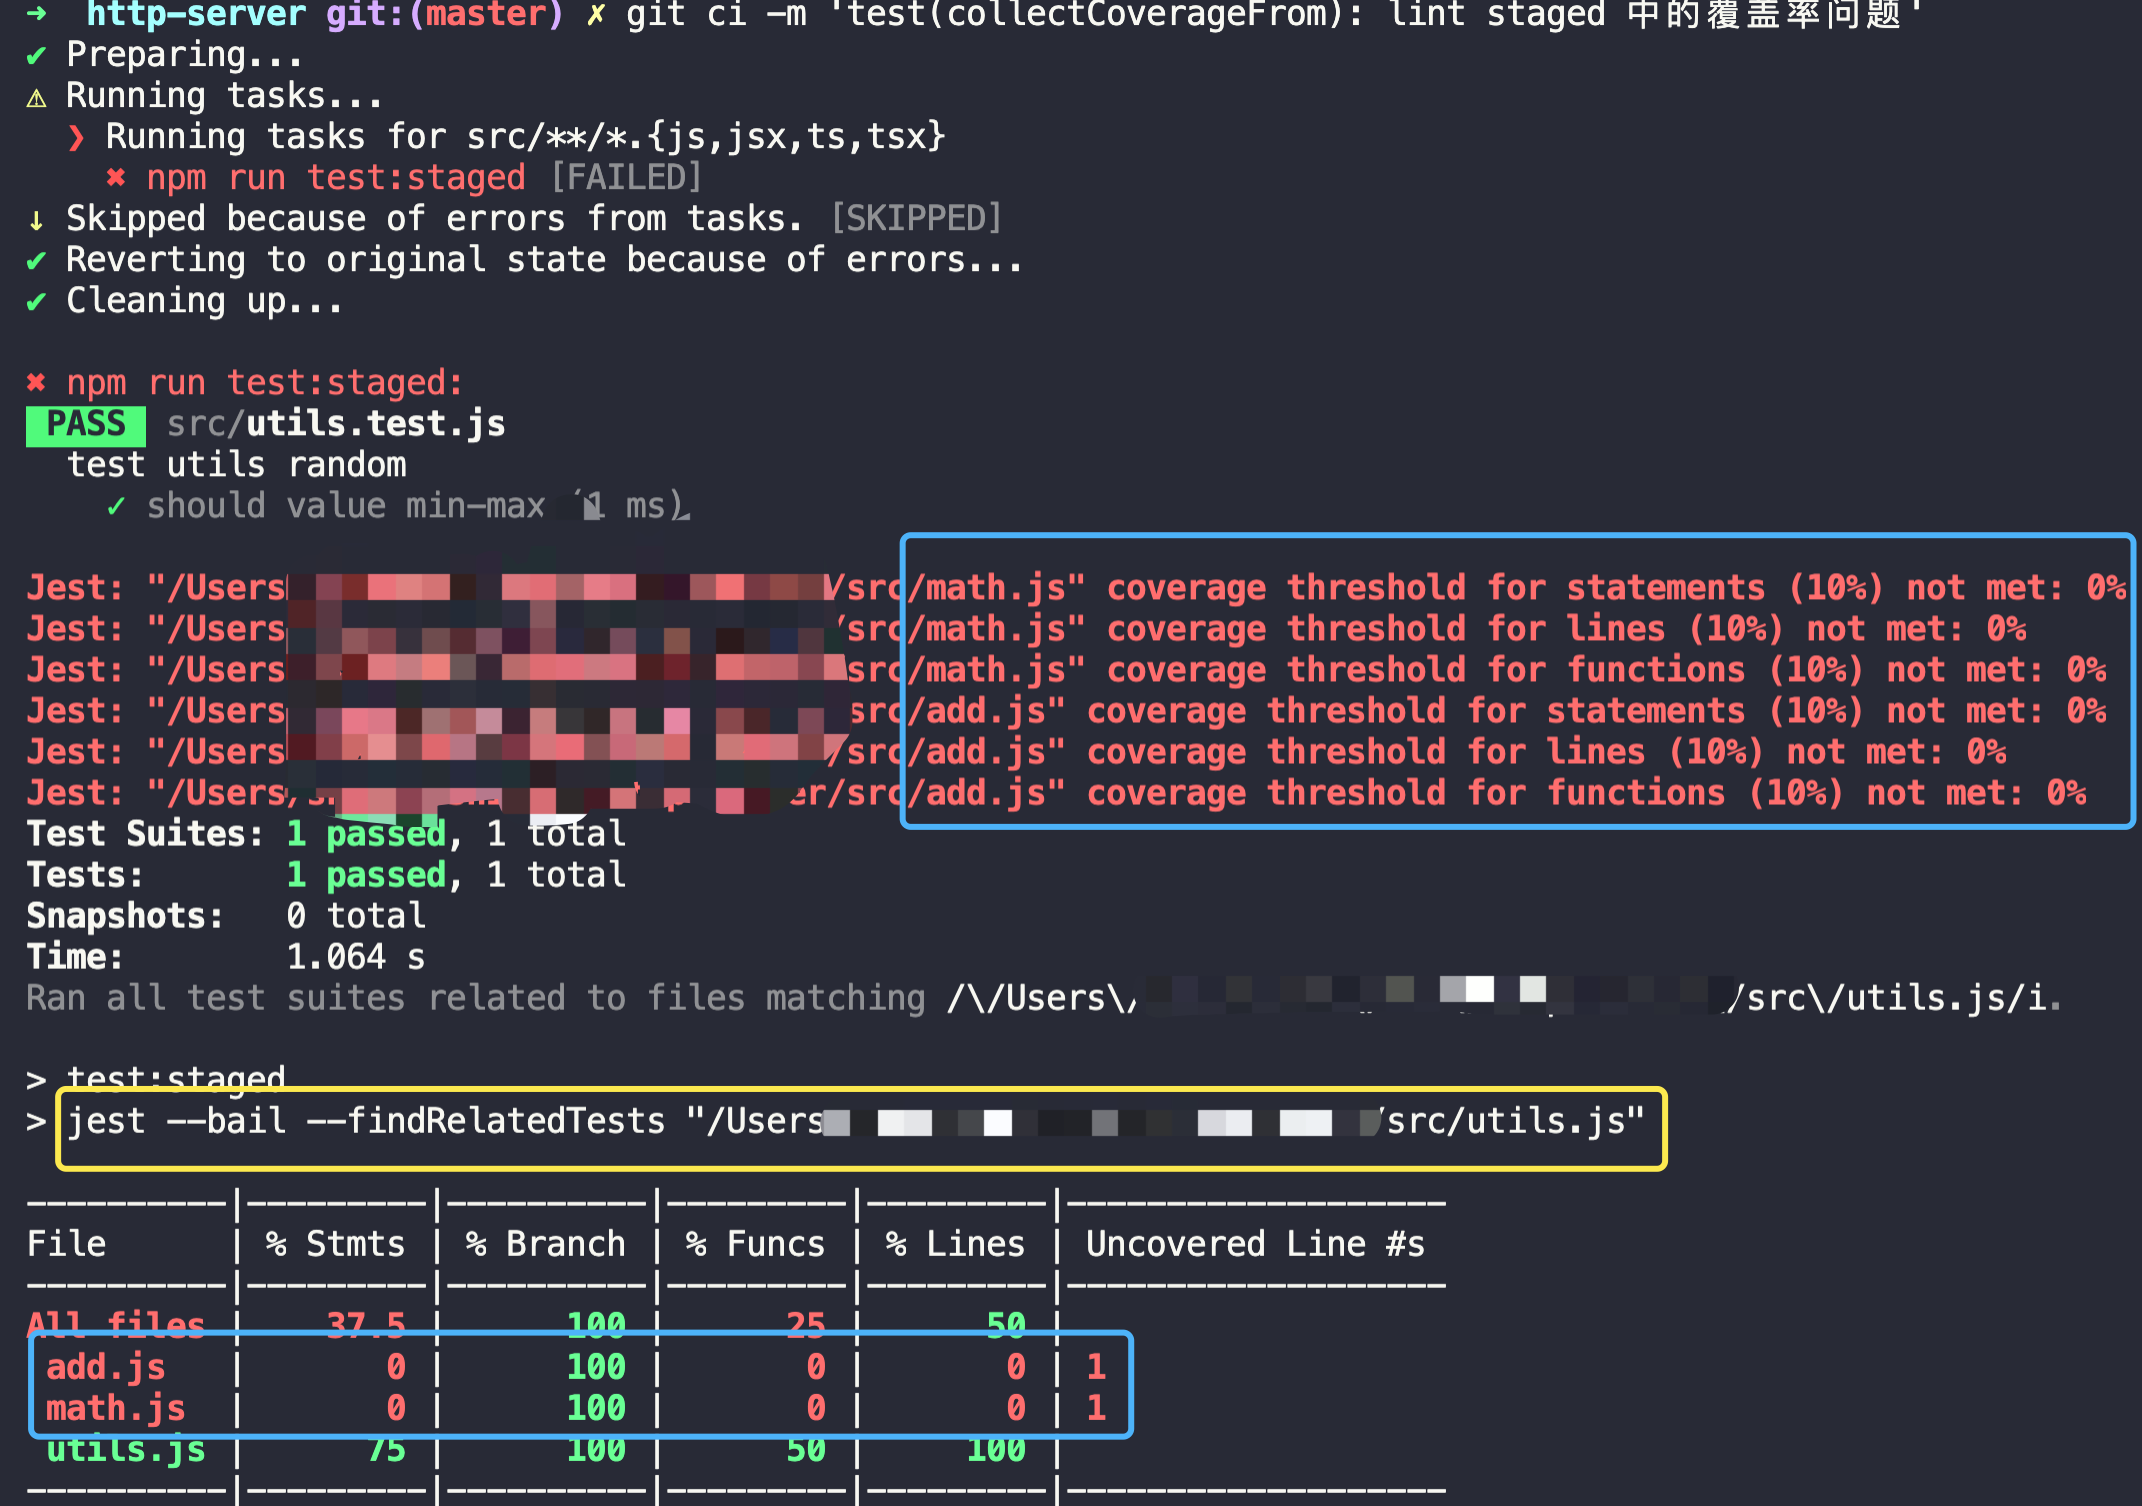
When we commit with commit, it triggers lint-staged, which, as we said in section 1, should only run the instance where the change occurred, and the coverage will only output the currently running instance.
But this is not the case, if collectCoverageFrom is configured, it will output coverage data for all files that match no matter how the single test is run.

As you can see from the yellow box, we only submitted utils.js this time, so we should just run and calculate the single test coverage of utils.js, but in fact, all the coverage will be output, and then most of the data will be 0, which can’t meet the requirement of coverage set.
But we can’t leave the collectCoverageFrom property unset, so my solution is: Exclusion Method.
This way we are satisfied with extracting coverage from only the files being tested when committing.
4. Summary
If you want to build something, you need to build something. Once we’ve built the configuration ahead of time, we’re ready to develop.