The main challenge in designing user interfaces using components is managing the application state on different components. Svelte provides a powerful capability to enable data passing between components.
“Great communication begins with connection.”
— Oprah Winfrey
Note: Oprah Gail Winfrey (born 29 January 1954) is an American television talk show host, producer, investor, philanthropist and actress, one of the most influential African-American celebrities in the United States, and one of the top 100 people of Time.
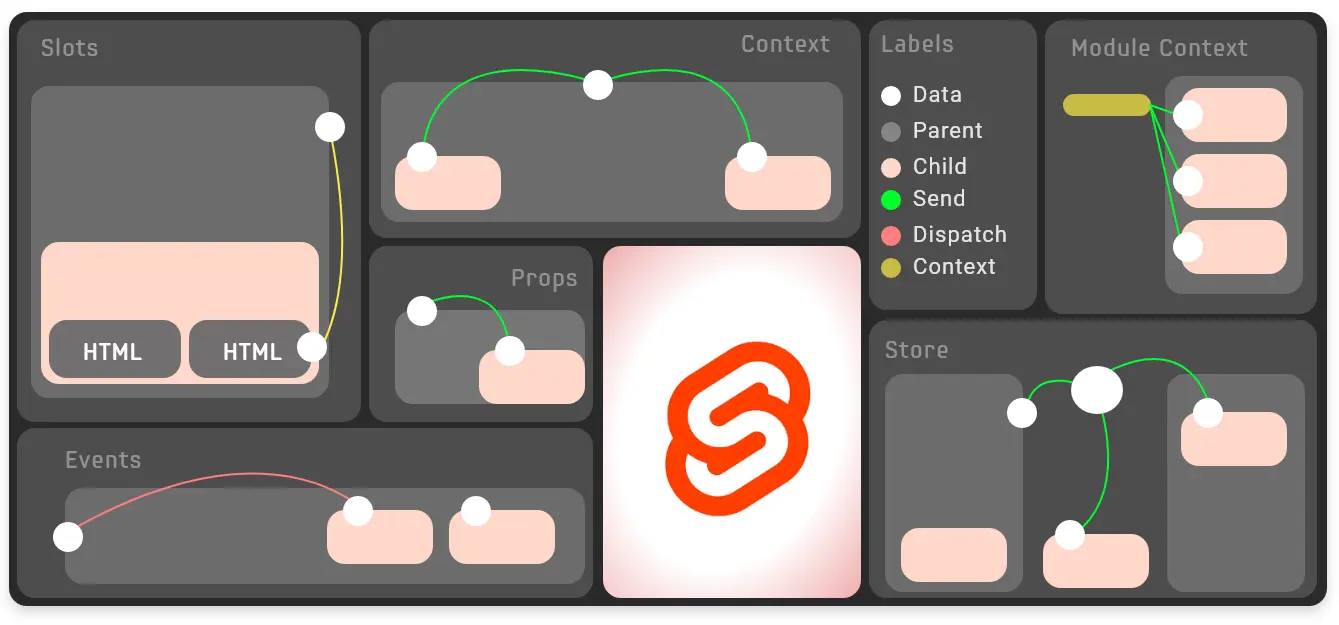
Let’s start with the 6 ways to implement communication between Svelte components, they are.
- sending data to child components: Props
- rendering HTML within the component: Slots
- notifying the parent component of data from the child component by means of events: Events
- passing data through the Context API: Context API
- share data between all instances of a component: Module Context
- sharing data between any components: Store
In this article we have written some simple examples that apply different Svelte component communication techniques. The code will not contain all the bits and pieces, but is just to give you an idea of the nature of these techniques.
1. Props
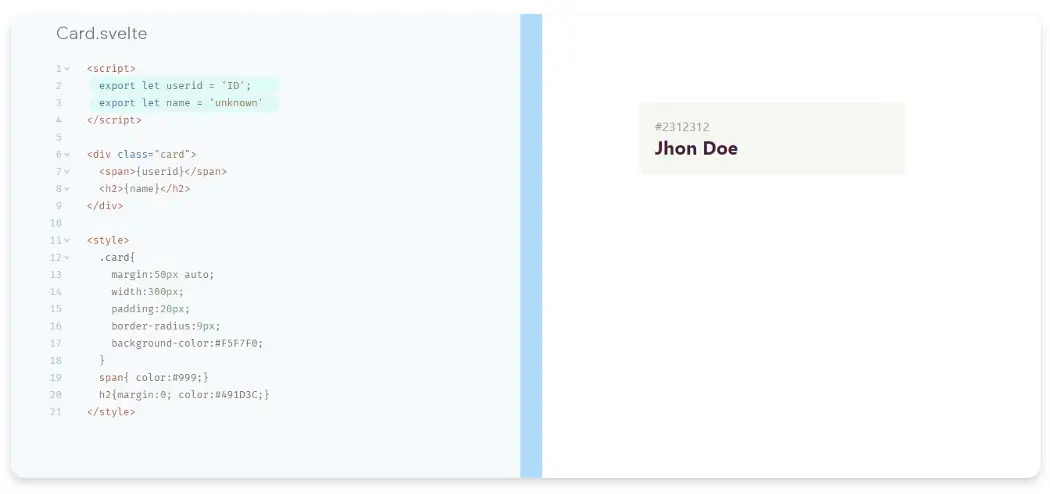
In real applications, it is often necessary to pass data from one component to other sub-components. The most basic way to do this is to use component properties, which can be defined in Svelte using the export keyword.
Note the export keyword in the highlighted part of the code in the following figure.

Card.svelte with props
Simply introduce the Card component and pass the data to the Card via the properties.
Tip: Using Typescript in Svelte can solve the problem of property type checking within components.
2. Slots
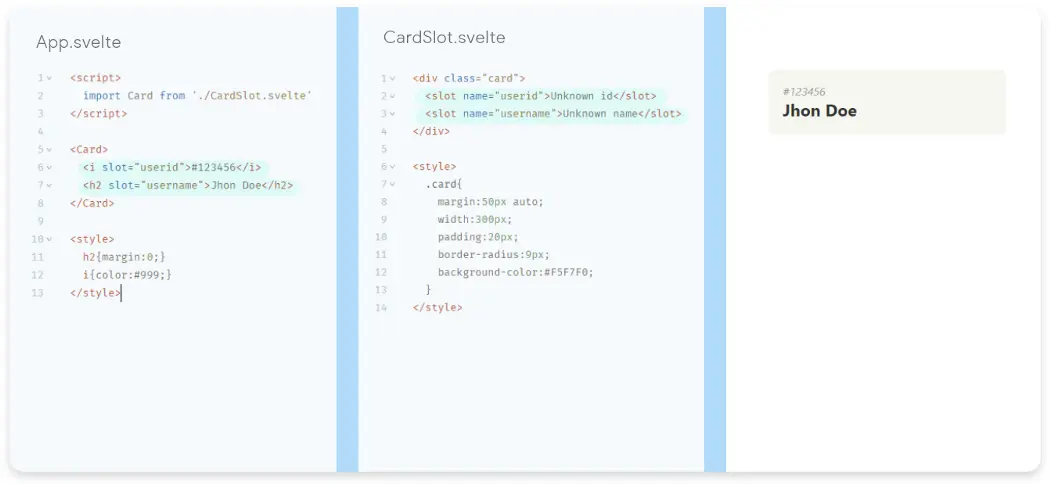
Slots (slots) – Sub-components can pass content to be rendered by using slots, which is based on the recommendation of Web component slots.
The default method of defining slots is to use the <slot> HTML tag in the child component.
Slots help to design the component as a template and also allow for the injection of HTML content based on naming. The following example demonstrates the practice of named slots.

Card component with slots
3. Events
When designing components, it is interesting to capture events from child components. Continuing to update the code above, when we click on the heart icon it will toggle between like and dislike. As shown in the diagram.

In order to distribute events, Svelte’s {createEventDispatcher} function needs to be introduced. This function will then be used to trigger events in the child component. Take a look at the code.
|
|
The CardEvent.svelte file dispatches events based on clicks.
Here we get three values, id, name, favor, which are then distributed to the parent component via dispatch.
App.svelte using CardEvent.svelte
This uses the {...} operator to set the user object as a property of the child component, and to listen for favorite click events, triggering the whenFavored() function to execute and set the value to the parent object when a click is made.
Hacking
- In multi-level nested components, events can be forwarded using
<card on:favorite />, which passes the event to the parent component, and this mechanism also applies to DOM events. - A child component can be passed as a reference to the parent component and all the methods output by the child component can be called in the parent component. For example, you can use
<Card bind:this={userCard} />to refer to theCardcomponent as auserCardobject.
4. Context API
The Context API. We now move on to the advanced part of Svelte’s communication technology, which is very useful. The Context API provides a powerful mechanism for implementing conversations between components.
“Communication is only effective when we communicate in a way that is meaningful to the recipient, not ourselves.”
— Rich Simmonds (Co-founder and CEO of LinkedIn)
First the top level component needs to set the data using setContext() and then the other components get the data using getContext(). Isn’t that rather simple?
We pass the object user to all child components via the context API.
|
|
CardContext.svelte
Note that the state in the context is only valid for child components, which is useful if multiple instances of the component are to be used without the state of one component interfering with the state of the others.
5. Module Context
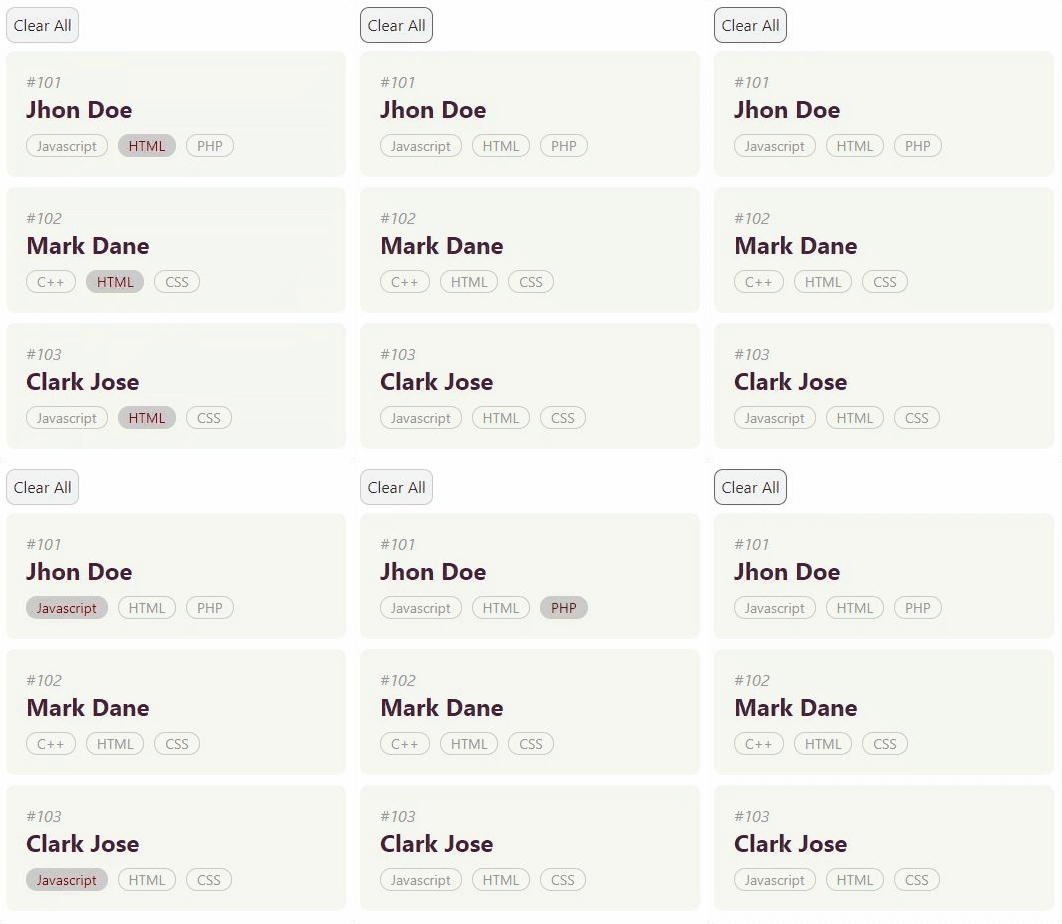
In Svelte, it is very easy for multiple instances of the same component to share the same data by defining these variables between <script context='module'></script>.
Here’s an example, when the tag noun is clicked, other instances of the component will display the same effect accordingly.

Click on Clear All to clear the status of all buttons. First create an instance of Card in App.svelte using the users object and pass the user object using the properties.
|
|
App.svelte
Also add a module method {clearAll} to clear all highlighted tags.
|
|
CardWithModuleContext.svelte
The variable tagSelected will be shared between the different instances of the component and it is interesting to understand that a timer of 100 milliseconds is added here to update the highlighting of the tags. As you can see, all the logic in the subcomponent is used to communicate with other instances.
6. Store
As applications become more and more complex, adding more and more features and components, the complexity increases. At this point we need to keep some application state outside of the component hierarchy. The store built into Svelte does this.
Svelte store can store single objects, arrays, etc. Svelte provides a variety of stores, including writable, readable, derived, or custom.
A simple example of how to implement a list of books follows.
BookStore.js.
BookList.svelte
BookForm.svelte
|
|
App.svelte
Here a bookStore is created as a writable array, which is referenced in the form and list components via the $ syntactic sugar to access the data.
Context vs Store
Context and Store are similar in that Store can be accessed from any component of the application, whereas Context can only be used for child components.
Sample Code
Discover all the examples presented in this article, which are available in Svelte REPL. To test, update the App.svelte file by importing a different card component to check the results. (demo)
Conclusion
Building communication between components is the most important part of application design. In Svelte we have built-in features for state management that can give us good flexibility to design better applications.
Reference
https://betterprogramming.pub/6-ways-to-do-component-communications-in-svelte-b3f2a483913c