In this section, we will learn how to use deep learning to recognize sliding CAPTCHA.
1. Preparation
We mainly focus on completing the process of using the deep learning model to identify the CAPTCHA gap this time, so we will not focus on explaining the algorithm of the deep learning model, and also because the whole model implementation is more complex, this section will not write the code from scratch, but we tend to download the code in advance for hands-on practice.
So at the end, please download the code in advance, the repository address is: https://github.com/Python3WebSpider/DeepLearningSlideCaptcha2, and use Git to clone it down to.
|
|
After running, a DeepLearningImageCaptcha2 folder will appear locally, which proves that the cloning was successful.
Once the cloning is complete, switch to the DeepLearningImageCaptcha2 folder and install the necessary dependencies.
|
|
After running the project, all the dependencies needed to run the project will be installed.
Once all the above preparations are done, let’s start the formal learning of this section.
2. Target detection
This problem of identifying sliding CAPTCHA gaps can actually be attributed to the target detection problem. What does target detection mean? Here is a brief introduction.
Target detection, as the name implies, is to find out what we want to find. For example, given a picture of a “dog”, as shown in the figure.
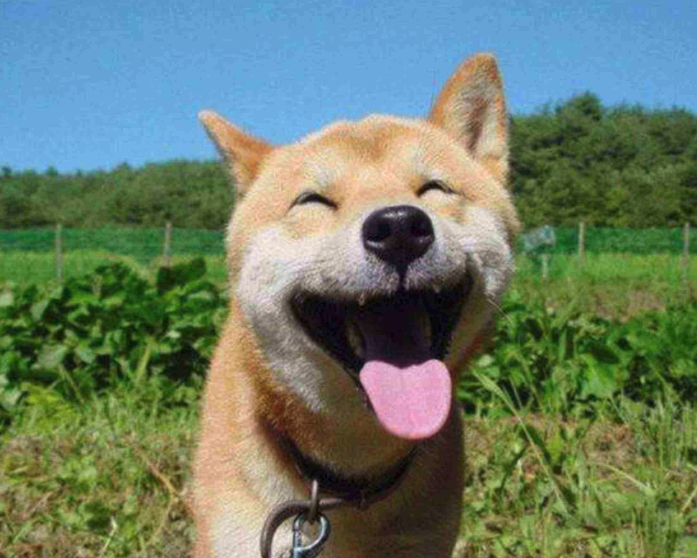
We want to know where the dog is and where its tongue is, and when we find them, we frame them out, which is target detection.
After processing by the target detection algorithm, we expect to get an image that looks like this
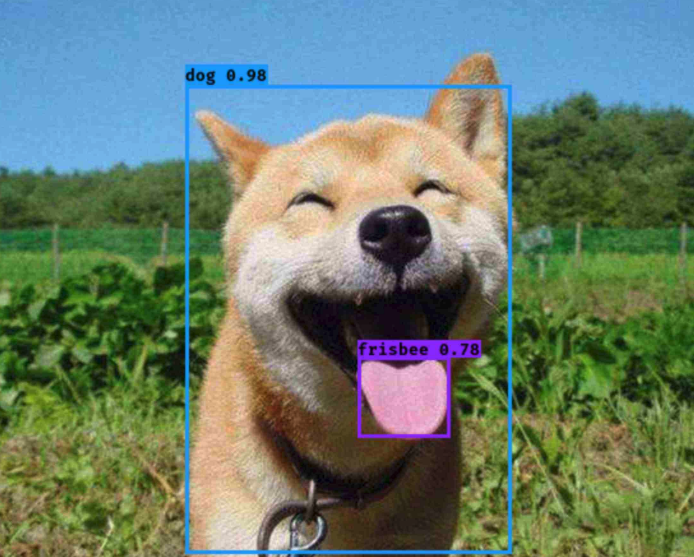
You can see that the dog and its tongue are framed out, which completes a good target detection.
Now the more popular target detection algorithms are R-CNN, Fast R-CNN, Faster R-CNN, SSD, YOLO, etc., interested in understanding, of course, do not know much about the goal to be accomplished in this section also has no impact.
The current algorithm for target detection has two main methods, one-stage and two-stage, called One stage and Two stage in English, briefly described as follows.
- Two Stage: The algorithm first generates a series of candidate boxes for the location of the target, and then performs sample classification on the results of these box selections, that is, first find out where, and then separate out what it is, as the saying goes, “look twice”, this algorithm has R-CNN, Fast R-CNN, Faster R-CNN, etc. These algorithms are relatively complex in architecture, but have advantages in accuracy.
- One Stage: Without generating candidate frames, the problem of target localization and classification is directly transformed into a regression problem, which is commonly called “one look”. These algorithms have YOLO and SSD, which are not as accurate as Two stage, but have relatively simple architecture and faster detection speed.
So this time we choose One Stage’s representative target detection algorithm YOLO to implement the sliding CAPTCHA gap recognition.
YOLO, the full name of the algorithm is You Only Look Once, which is the name of the algorithm by taking their initials.
The latest version of the YOLO algorithm is the V5 version, the more widely used is the V3 version, here the specific process of the algorithm we do not introduce, interested parties can search the relevant information to understand the next, in addition, you can also understand the differences and improvements of the YOLO V1-V3 version, here are a few reference links.
- YOLO V3 paper: https://pjreddie.com/media/files/papers/YOLOv3.pdf
- YOLO V3 Introduction: https://zhuanlan.zhihu.com/p/34997279
- YOLO V1-V3 comparison introduction: https://www.cnblogs.com/makefile/p/yolov3.html
3. Data Preparation
As introduced in the previous section, to train the deep learning model, we also need to prepare the training data, which is also divided into two parts: one is the CAPTCHA image, and the other is the data annotation, i.e., the location of the gap. But what is different from the previous section is that this time the annotation is no longer just the CAPTCHA text, because this time we need to represent the location of the gap, the gap corresponds to a rectangular box, to represent a rectangular box, at least four data, such as the horizontal and vertical coordinates x, y of the upper left corner point, the width and height w, h of the rectangle, so the annotation data becomes four numbers.
So, next we need to prepare some captcha images and the corresponding four-digit labeling, such as the following sliding captcha.
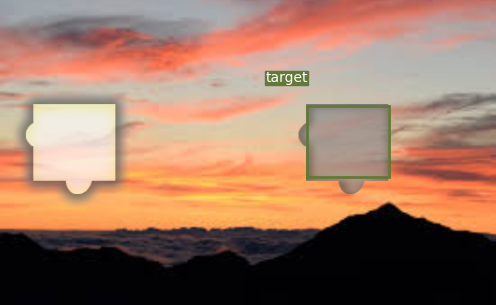
Okay, so let’s complete these two steps, the first step is to collect the CAPTCHA image, and the second step is to mark the location of the gap and convert it to the four digits we want.
Here our example website is https://captcha1.scrape.center/, after opening it click the login button and a sliding CAPTCHA will pop up, as shown in the picture.

All we need to do is save the image of the sliding CAPTCHA separately, which is this area.
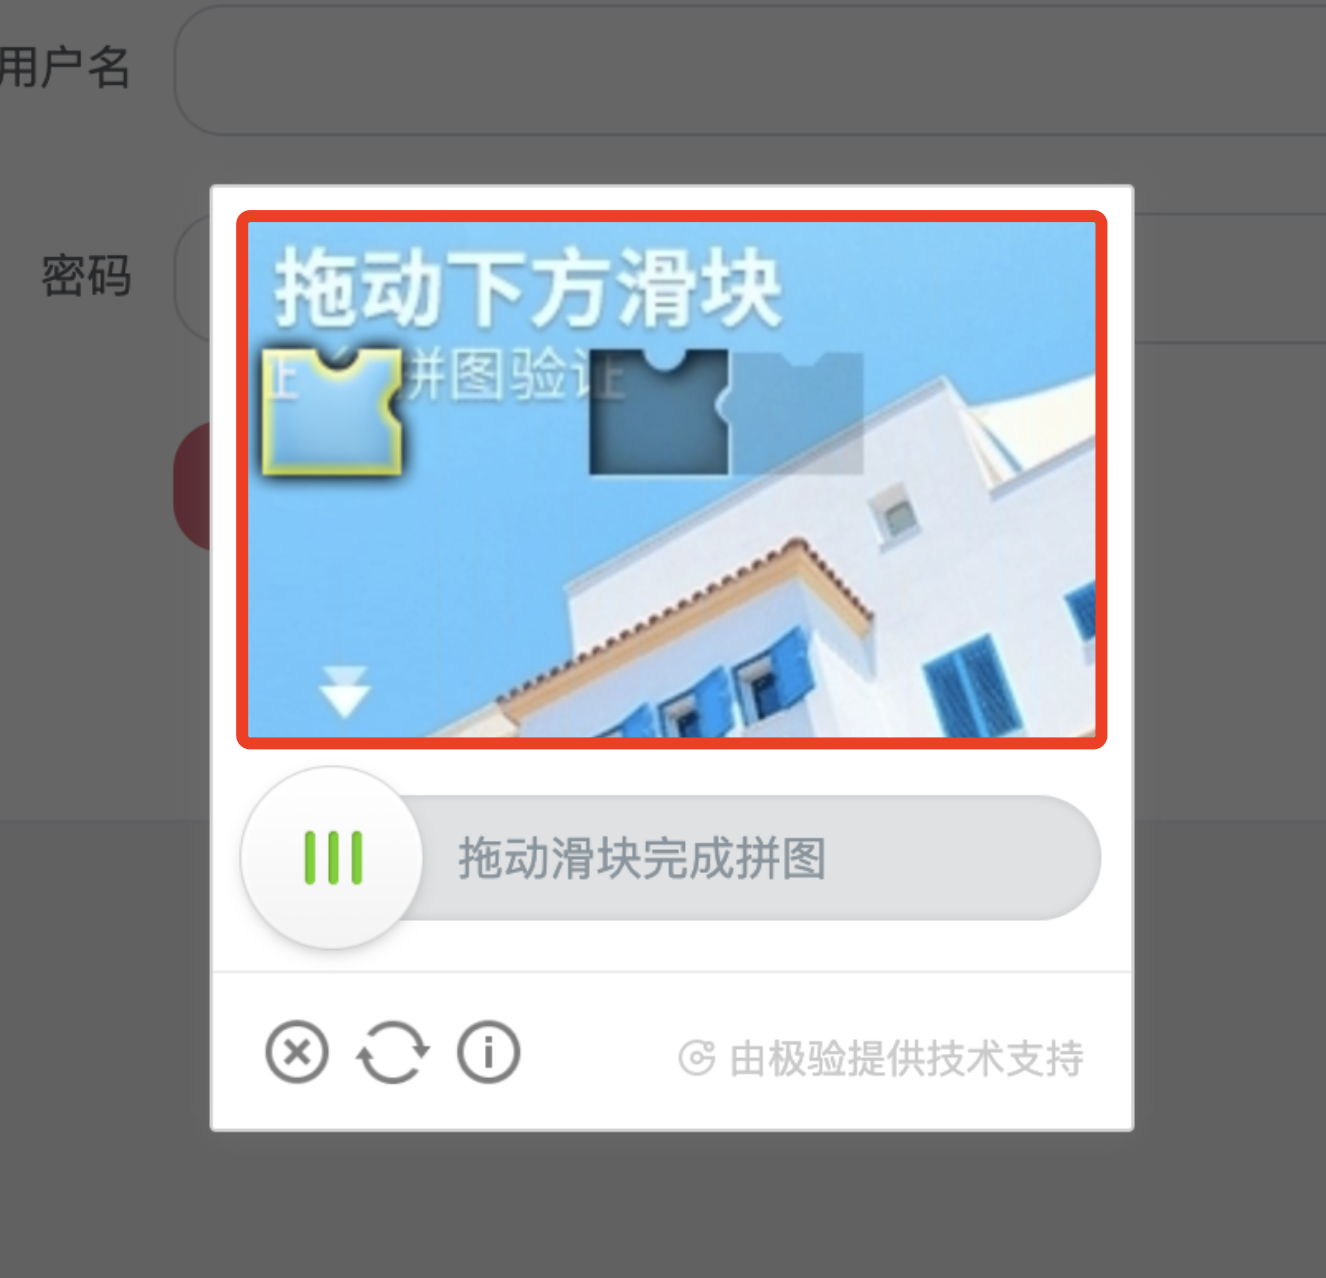
How to do it? Manual screenshots are not reliable, time-consuming, and do not accurately locate the boundaries, resulting in large and small saved images. To solve this problem, we can simply write a script to automate the crop and save, which is the collect.py file in the repository, with the following code.
|
|
Here we first define a loop with COUNT cycles, each cycle starts a browser using Selenium, then opens the target website, simulates clicking the login button to trigger the CAPTCHA popup, then intercepts the node corresponding to the CAPTCHA and saves it with the screenshot method.
We run it as follows.
|
|
After running it, we can get a lot of captcha images in the data/captcha/images/ directory, as shown in the following example.
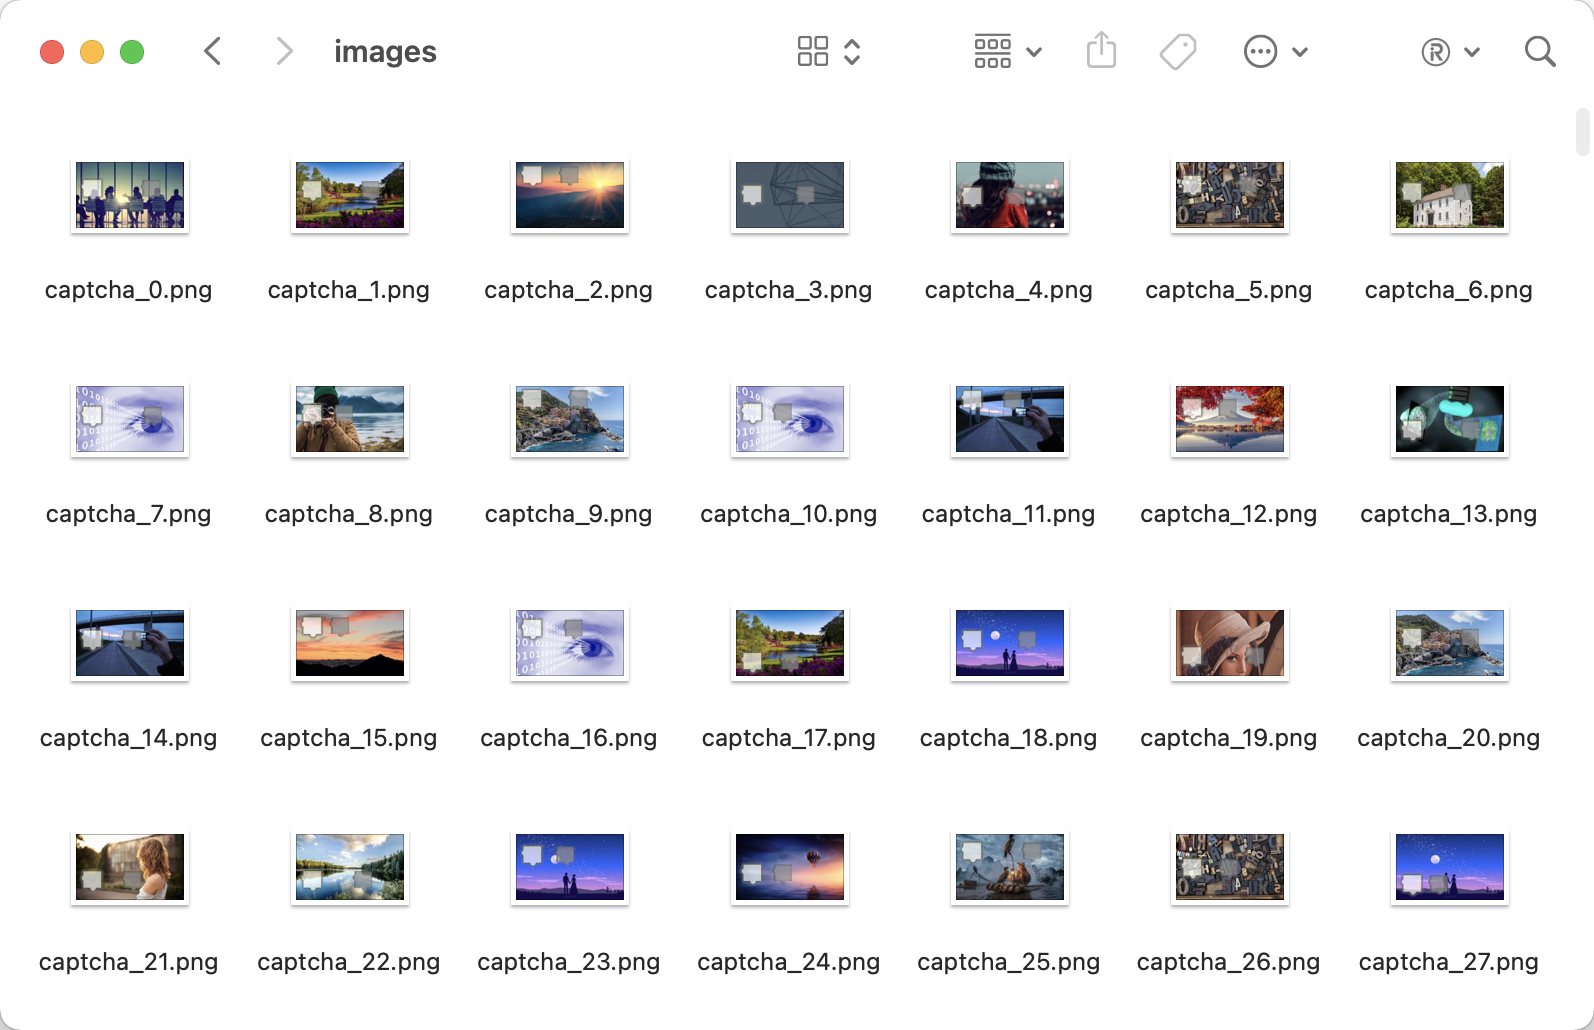
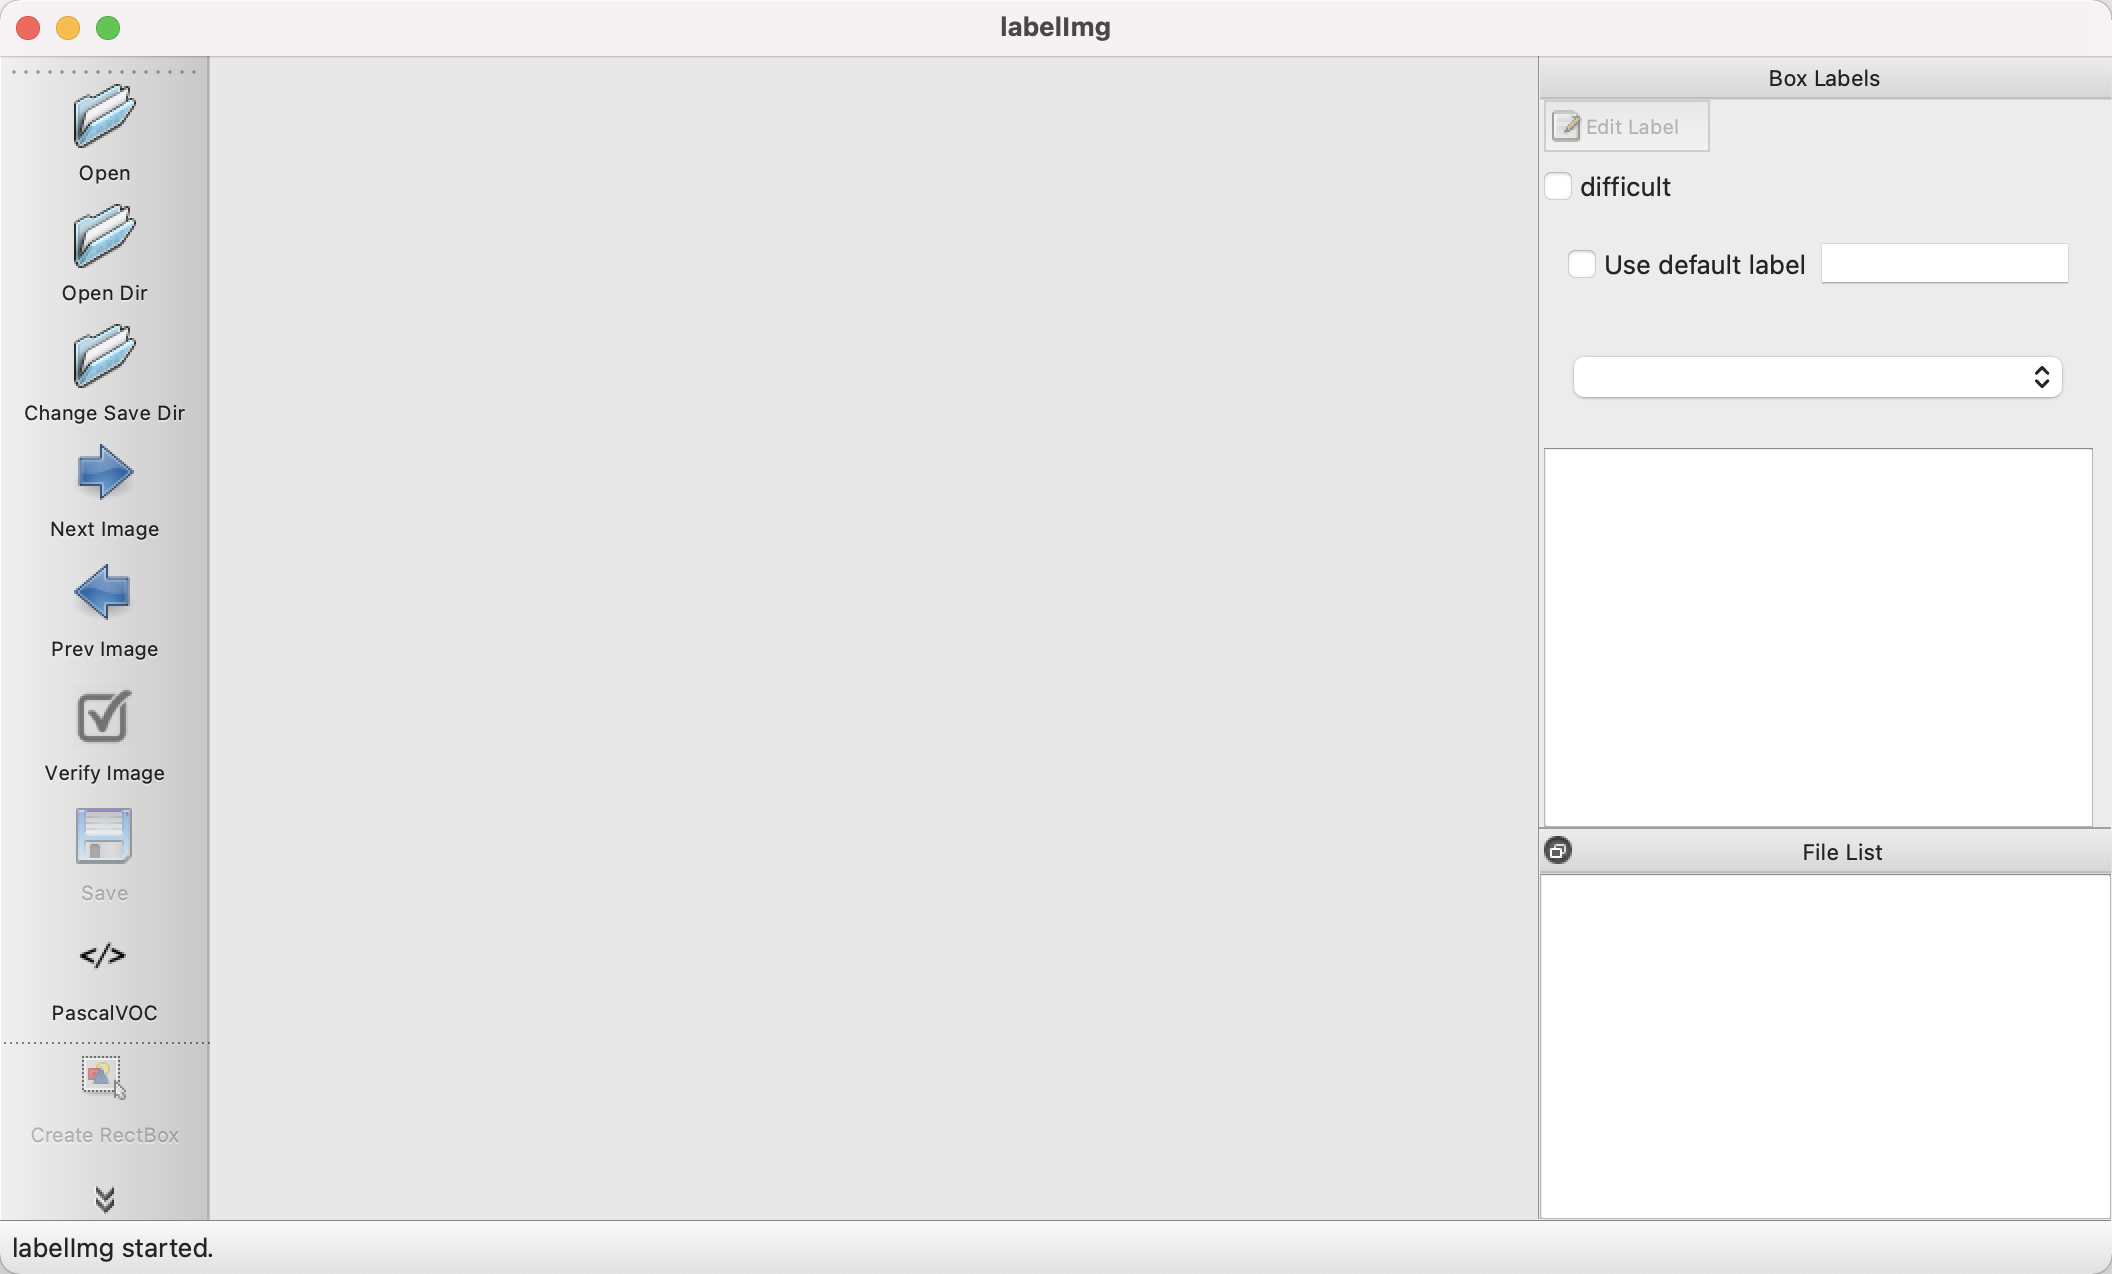
After obtaining the CAPTCHA image, we need to annotate the data. The recommended tool is labelImg, available on GitHub at https://github.com/tzutalin/labelImg, and can be installed using pip3.
|
|
Once the installation is complete you can run it directly from the command line at
|
|
This successfully launches labelImg.
Click Open Dir to open the data/captcha/images/ directory, then click Create RectBox in the lower left corner to create a label box, we can select the rectangular box where the gap is located, after the box is selected labelImg will prompt to save a name, we will name it target, and then click OK, as shown in the figure.
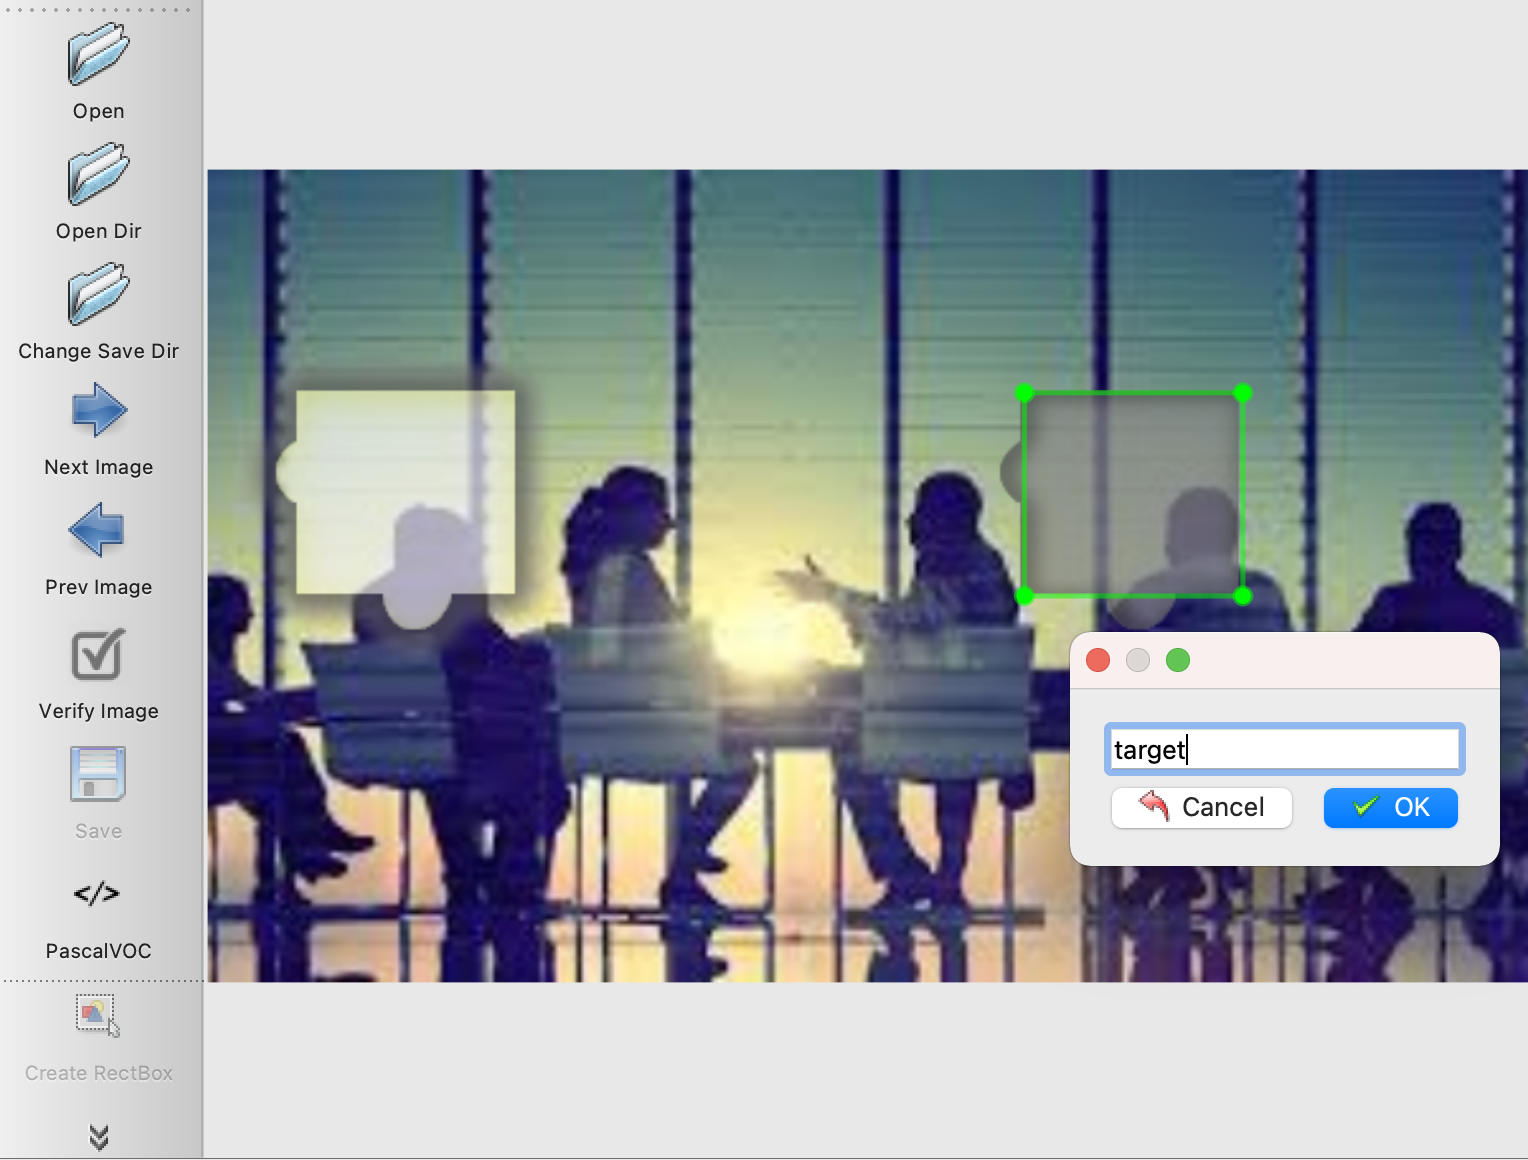
At this point we can see that it saves an xml file with the following content.
|
|
We can see that there are three nodes in the size node, namely width, height and depth, which represent the width, height and number of channels of the original CAPTCHA image respectively. In addition, the bndbox node under the object node contains the location of the annotation gap. By observation and comparison, we can know that xmin and ymin refer to the coordinates of the upper left corner, and xmax and ymax refer to the coordinates of the lower right corner.
We can simply process the data in the following way.
|
|
Here we define a parse_xml method, which first reads the xml file, then uses the xmltodict library to convert the XML string to JSON, then reads out the width and height of the CAPTCHA, the location of the gap, and finally returns the desired data format – the coordinates of the top left corner of the gap and the relative width and height values, in the form of a tuple.
After all the annotation is done, calling this method on each xml file will generate the desired annotation result.
Here, I’ve processed the corresponding annotation results and can use them directly from data/captcha/labels, as shown here.
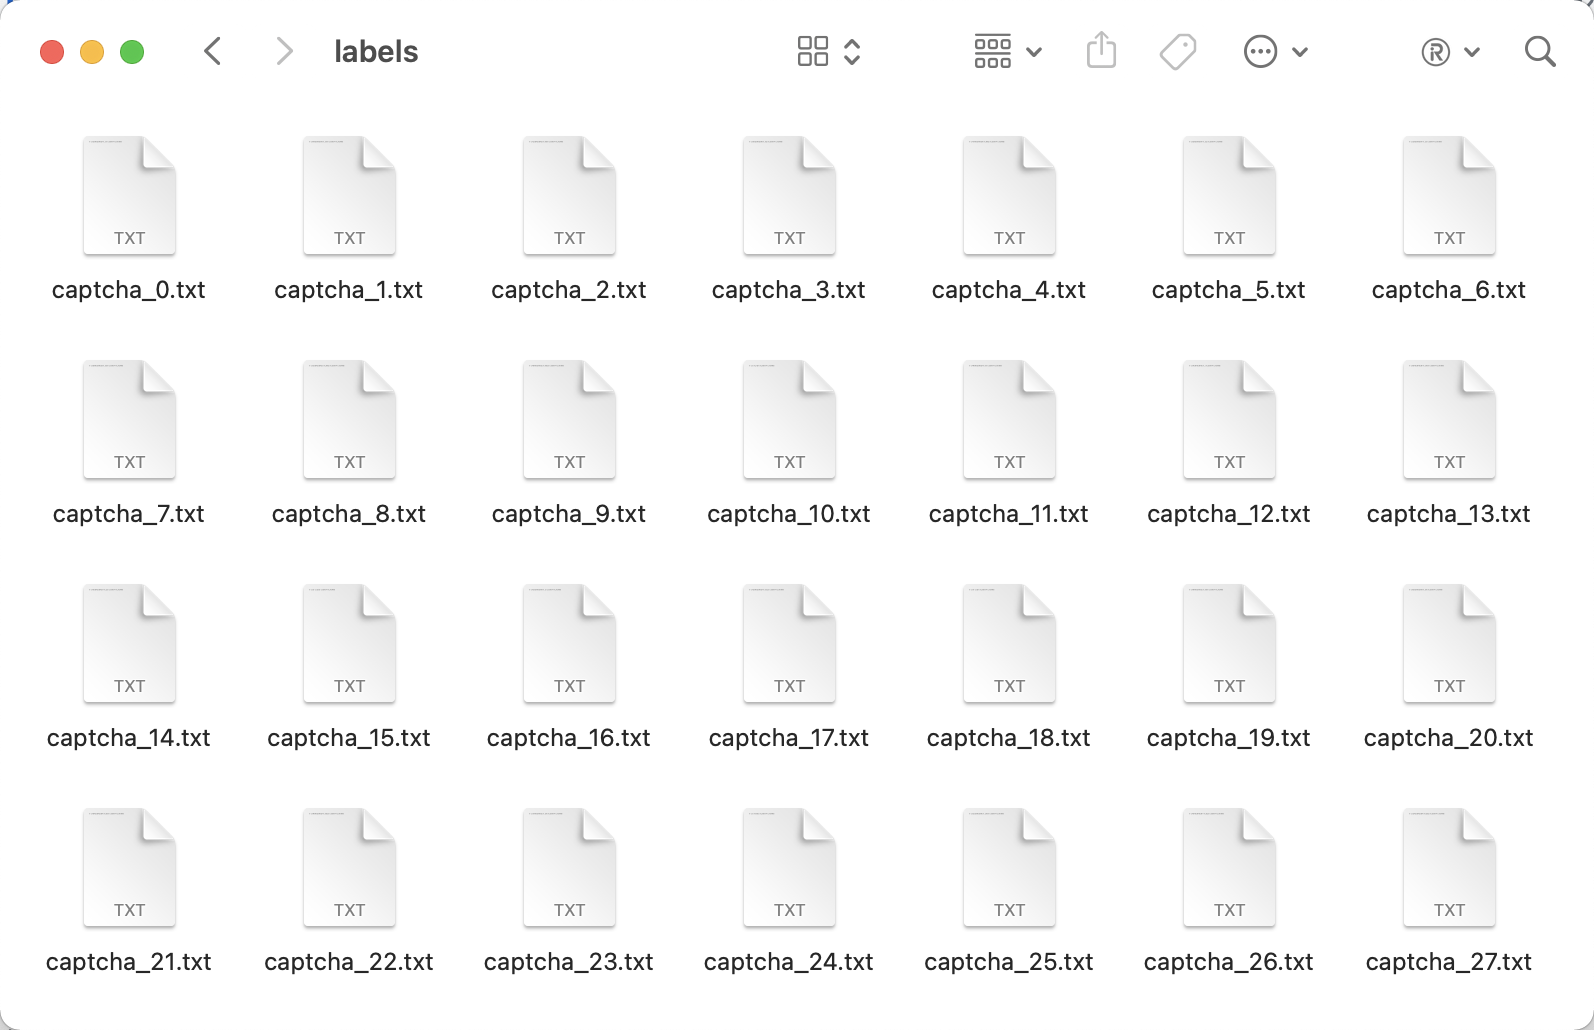
Each txt file corresponds to the annotated results of a CAPTCHA map, which looks like the following.
|
|
The first 0 represents the index of the annotation target, and since we only need to detect one gap, the index is 0. For example, the 5th bit 0.24 is multiplied by the height of CAPTCHA 320, the result is about 77, that is, the height of the gap is about 77 pixels.
Well, the data preparation phase is finished.
4. Training
For better training results, we also need to download some pre-trained models. Pre-training means there is already a base model trained in advance, we can directly use the weight file inside the model trained in advance, we don’t need to start training from scratch, we just need to fine-tune based on the previous model, so that we can save training time and have better results.
YOLOV3 training to load the pre-training model to have good training results, pre-training model download command is as follows.
|
|
Note: On Windows, please use a Bash command line tool such as Git Bash to run this command.
Execute this script to download some weights for the YOLO V3 model, including yolov3 and weights and darknet weights, which we need to use to initialize the YOLO V3 model before training.
Next, we can start the training by executing the following script.
|
|
Note: On Windows, please also use a Bash command line tool such as Git Bash to run this command.
It is also recommended to use the GPU for training, and during training we can use TensorBoard to see the changes in loss and mAP by running TensorBoard.
|
|
Note: Please make sure that you have installed all the dependencies of this project, including TensorBoard, and you can use the tensorboard command once it is installed successfully.
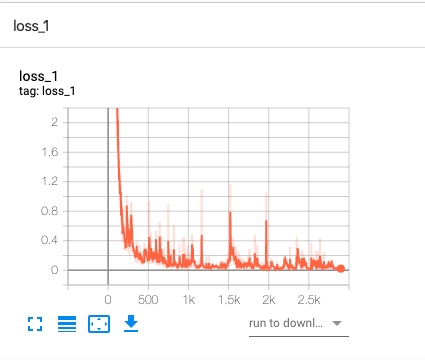
After running this command, you can observe the change of loss during training at http://localhost:6006.
The change in loss_1 is similar to the following.
The val_mAP change is similar to the following.
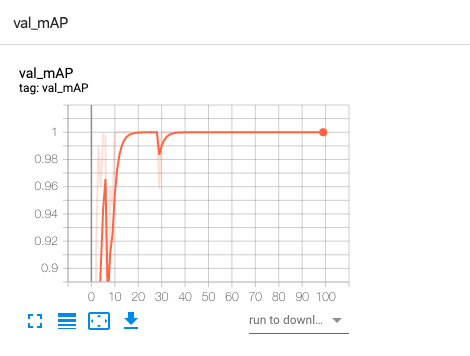
You can see that the loss drops from very high initially to very low, and the accuracy gradually approaches 100%.
Here are some outputs from the command line during the training process.
|
|
The changes of each metric during the training process are shown here, such as loss, recall, precision, and confidence, which represent the loss (the smaller the better), recall (the proportion of recognized results to those that should be recognized, the higher the better), precision (the percentage of recognized results that are correct, the higher the better), and confidence (the probability that the model is sure to recognize the right result, the higher the better), respectively, and can be used as a reference.
5. Testing
After training, the pth file is generated in the checkpoints folder, which is a collection of model files, the same as best_model.pkl in the previous section, but with a slightly different representation.
To run the test, we can first put some captcha images in the test folder data/captcha/test.
The sample captcha is as follows.

To run the test, execute the following script.
|
|
The script reads all the images from the test folder and outputs the processed results to the data/captcha/result folder, and the console outputs the results of some CAPTCHA recognition.
It also generates annotated results in data/captcha/result, like the following.
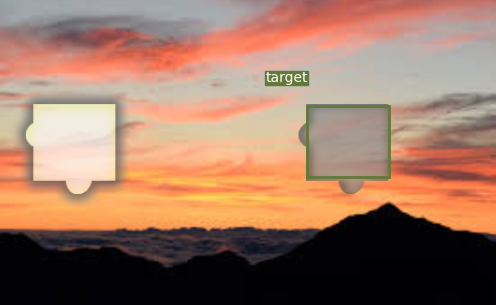
As you can see, the gaps are then accurately identified.
In fact, detect.sh is executing the detect.py file and there is a key output in the code as follows.
Here, bbox refers to the final notch outline position, while x1 refers to the leftmost outline of the leftmost offset of the whole CAPTCHA, i.e. offset.
With the target slider position, we can perform some simulated sliding operations to pass the CAPTCHA detection.
6. Summary
This section introduces the overall process of training a deep learning model to identify sliding CAPTCHA gaps, and finally we have successfully implemented the model training process and obtained a deep learning model file.
Using this model, we can input a sliding CAPTCHA, and the model will predict the location of the gap in it, including the offset, width, etc. Finally, we can draw the corresponding location with the information of the gap.
As in the previous section, what is introduced in this section can be further optimized as follows.
- The prediction process of the current model is executed through the command line, but it may not be very convenient in actual use. Consider exposing the prediction process to the API server, such as docking Flask, Django, FastAPI, etc. to implement the prediction process as an interface that supports POST requests, and the interface can receive a CAPTCHA image and return the text information of the CAPTCHA, which will make the model more convenient and easy to use.
The code in this section: https://github.com/Python3WebSpider/DeepLearningSlideCaptcha2.