resty is an HTTP client library for the Go language. resty is powerful and feature-rich. It supports almost all HTTP methods (GET/POST/PUT/DELETE/OPTION/HEAD/PATCH, etc.) and provides an easy-to-use API.
Quick Use
The code in this article uses Go Modules.
Create the directory and initialize.
Install the resty library.
|
|
Here we get the information on the first page of Baidu.
|
|
Resty is relatively simple to use.
- First, call a resty.New() to create a client object.
- call the R() method of the client object to create a request object.
- Call the Get()/Post() methods of the request object, pass in the parameter URL, and you can send an HTTP request to the corresponding URL. Returning a response object.
- The response object provides a number of methods to check the status of the response, header, cookies, and other information.
In the above program we have obtained.
StatusCode(): status code, e.g. 200Status(): status code and status information, e.g. 200 OK.Proto(): protocol, e.g. HTTP/1.1.Time(): the time from sending the request to receiving the response.ReceivedAt(): the moment when the response was received.Size(): the size of the response.Header(): the response header information, returned as http.Header type, i.e. map[string][]string.Cookies(): the cookie information set by the server via the Set-Cookie header.
Basic information about the response output from running the program.
header information.
|
|
Note that there is a Set-Cookie Header, which appears in the Cookie section.
|
|
Automatic Unmarshal
Many sites now provide API interfaces that return structured data in JSON/XML format, etc. resty can automatically Unmarshal the response data into the corresponding structured object. To see an example, we know that many js files are hosted on cdn and we can get the basic information of these libraries through api.cdnjs.com/libraries and return a JSON data in the following format.
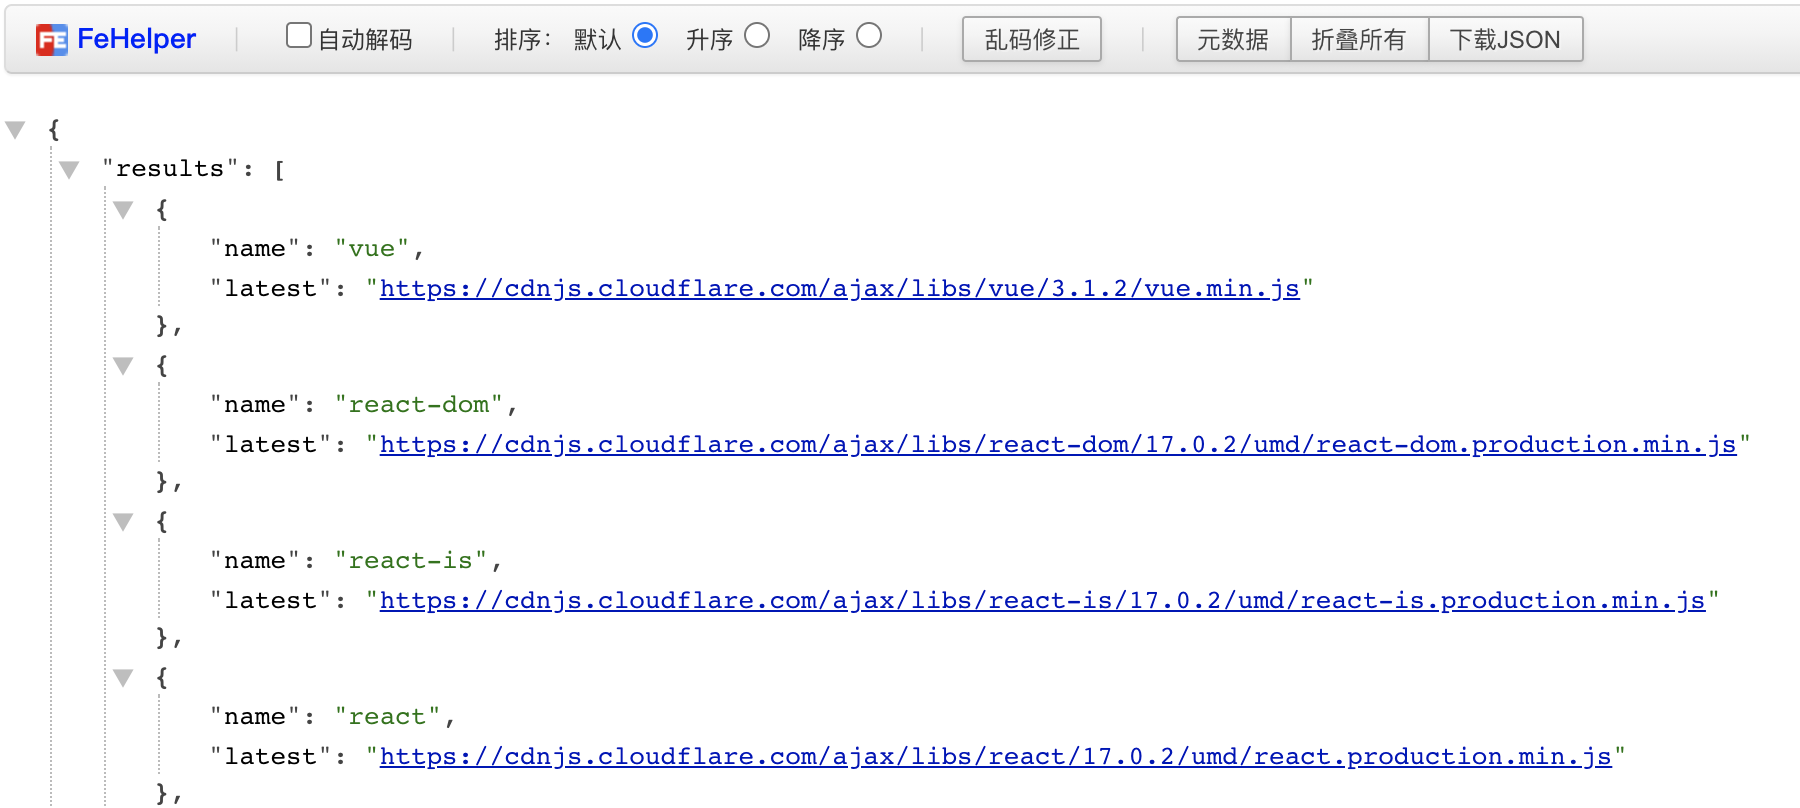
Next, we define the struct and then use resty to pull information, automatically Unmarshal.
|
|
As you can see, we just need to create a result type object and call the SetResult() method of the request object, and resty will automatically Unmarshal the response data into the incoming object. Here the request information is set using a chain call approach, i.e., multiple settings are done in one line.
Run
There are 4040 libraries in total and the first one is Vue ✌️. We can get the details of Vue by requesting https://api.cdnjs.com/libraries/vue.
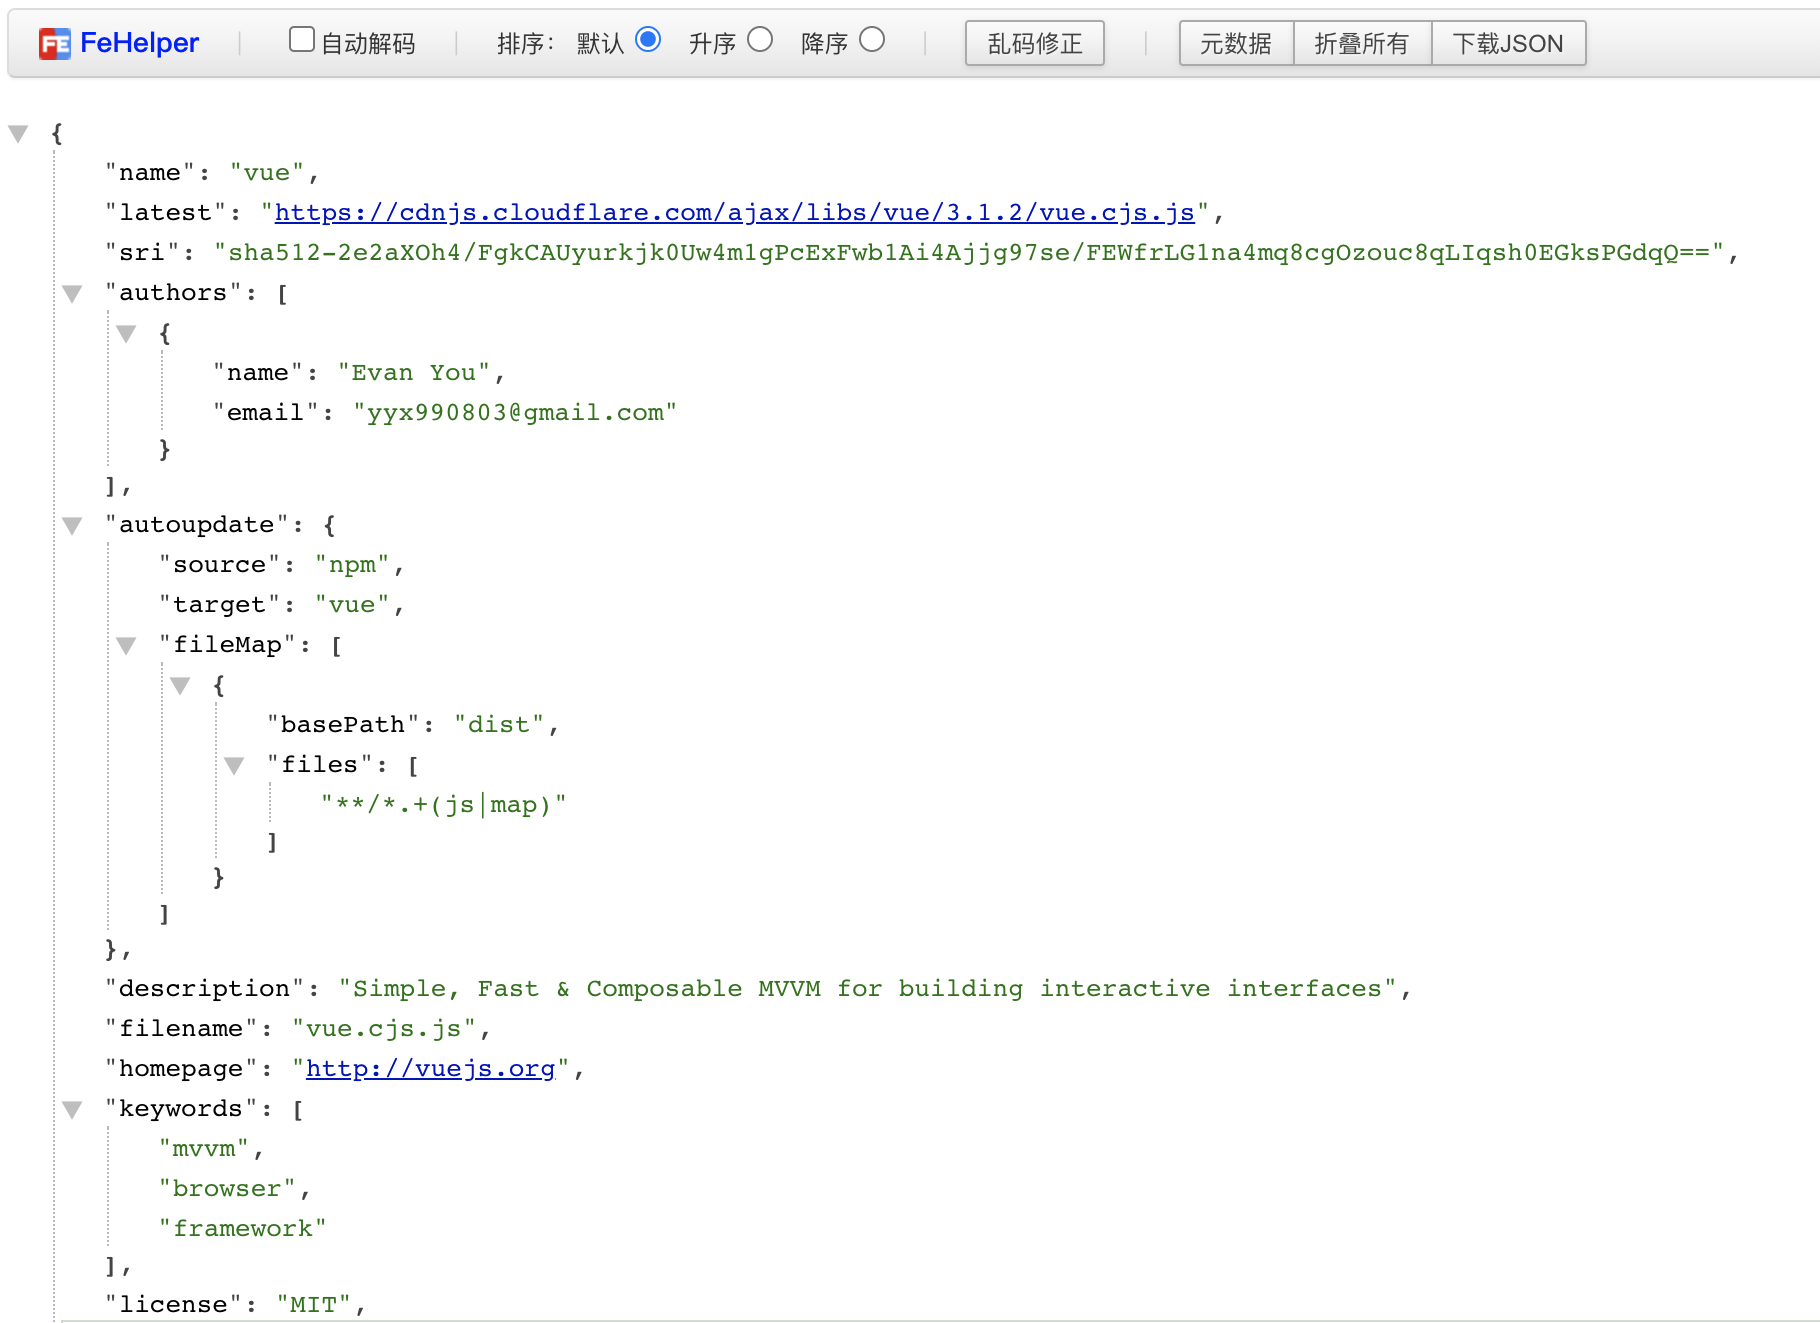
Interested in pulling this information yourself with resty.
Normally with a request, resty will infer the data format based on the Content-Type in the response. But sometimes the response has no Content-Type header or is not in the same format as the content, we can force resty to parse the response in a specific format by calling ForceContentType() on the request object.
Request Information
resty provides a rich set of methods for setting request information. We can set the query string in two ways. One is to call SetQueryString() of the request object to set our spliced query string.
The other is to call SetQueryParams() on the request object, pass in map[string]string, and let resty do the splicing for us. Obviously this is more convenient.
resty also provides a very useful interface for setting path parameters, we call SetPathParams() and pass in the map[string]string parameter, then the keys in this map can be used later in the URL path.
Note that the keys in the path need to be wrapped with {}.
Set Header.
Set the request body.
The message body can be of various types: string, []byte, struct, map[string]interface{}, etc.
Set to carry Content-Length header, resty automatically calculates.
Some sites need to get a token before they can access its API. To set the token.
Demo
Finally, let’s string together all of the above with a case study. Now we want to get the organization’s repository information through the API provided by GitHub, see the link after the article for the API documentation. The GitHub API request address is https://api.github.com, and the request format for getting repository information is as follows.
|
|
We can also set these parameters as follows.

accept: Header, this is required and needs to be set toapplication/vnd.github.v3+json.org: Organization name, path parameter.type: repository type, query parameters, e.g. public/private/forks (fork’s repository), etc.sort: sorting rule of the repository, query parameters, e.g. created/updated/pushed/full_name, etc. default sort by creation time.direction: ascending asc or descending dsc, query parameters.per_page: how many entries per page, max 100, default 30, query parameter.page: current request page number, with per_page for paging management, default 1, query parameter.
The GitHub API must be set up with a token to access it. Log in to your GitHub account, click on your avatar in the top right corner, and select Settings.
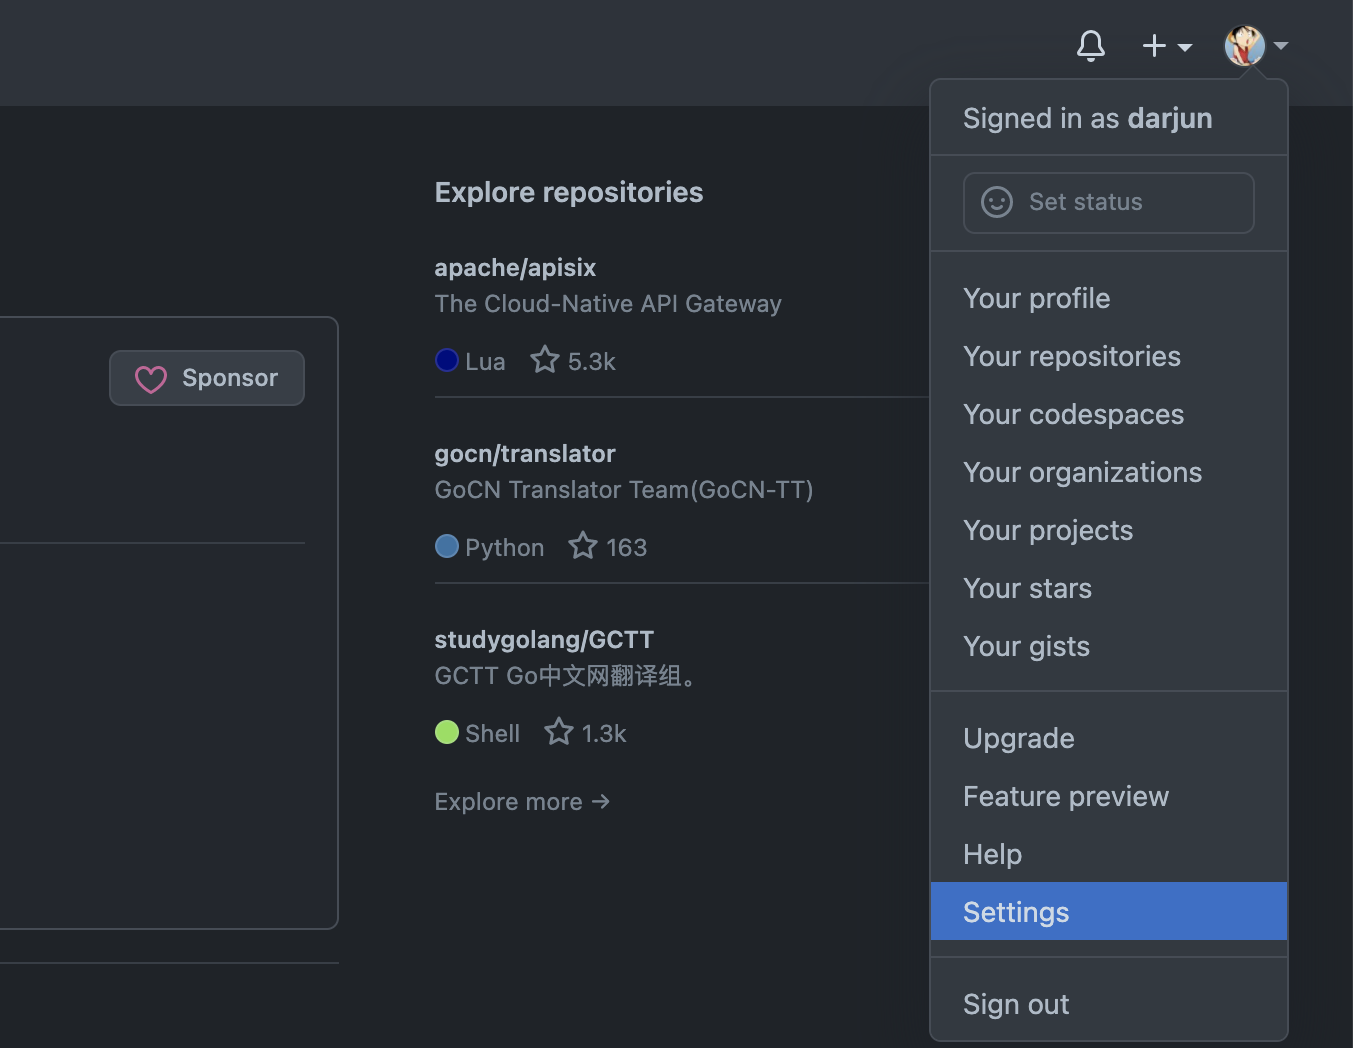
Then, select Developer settings.
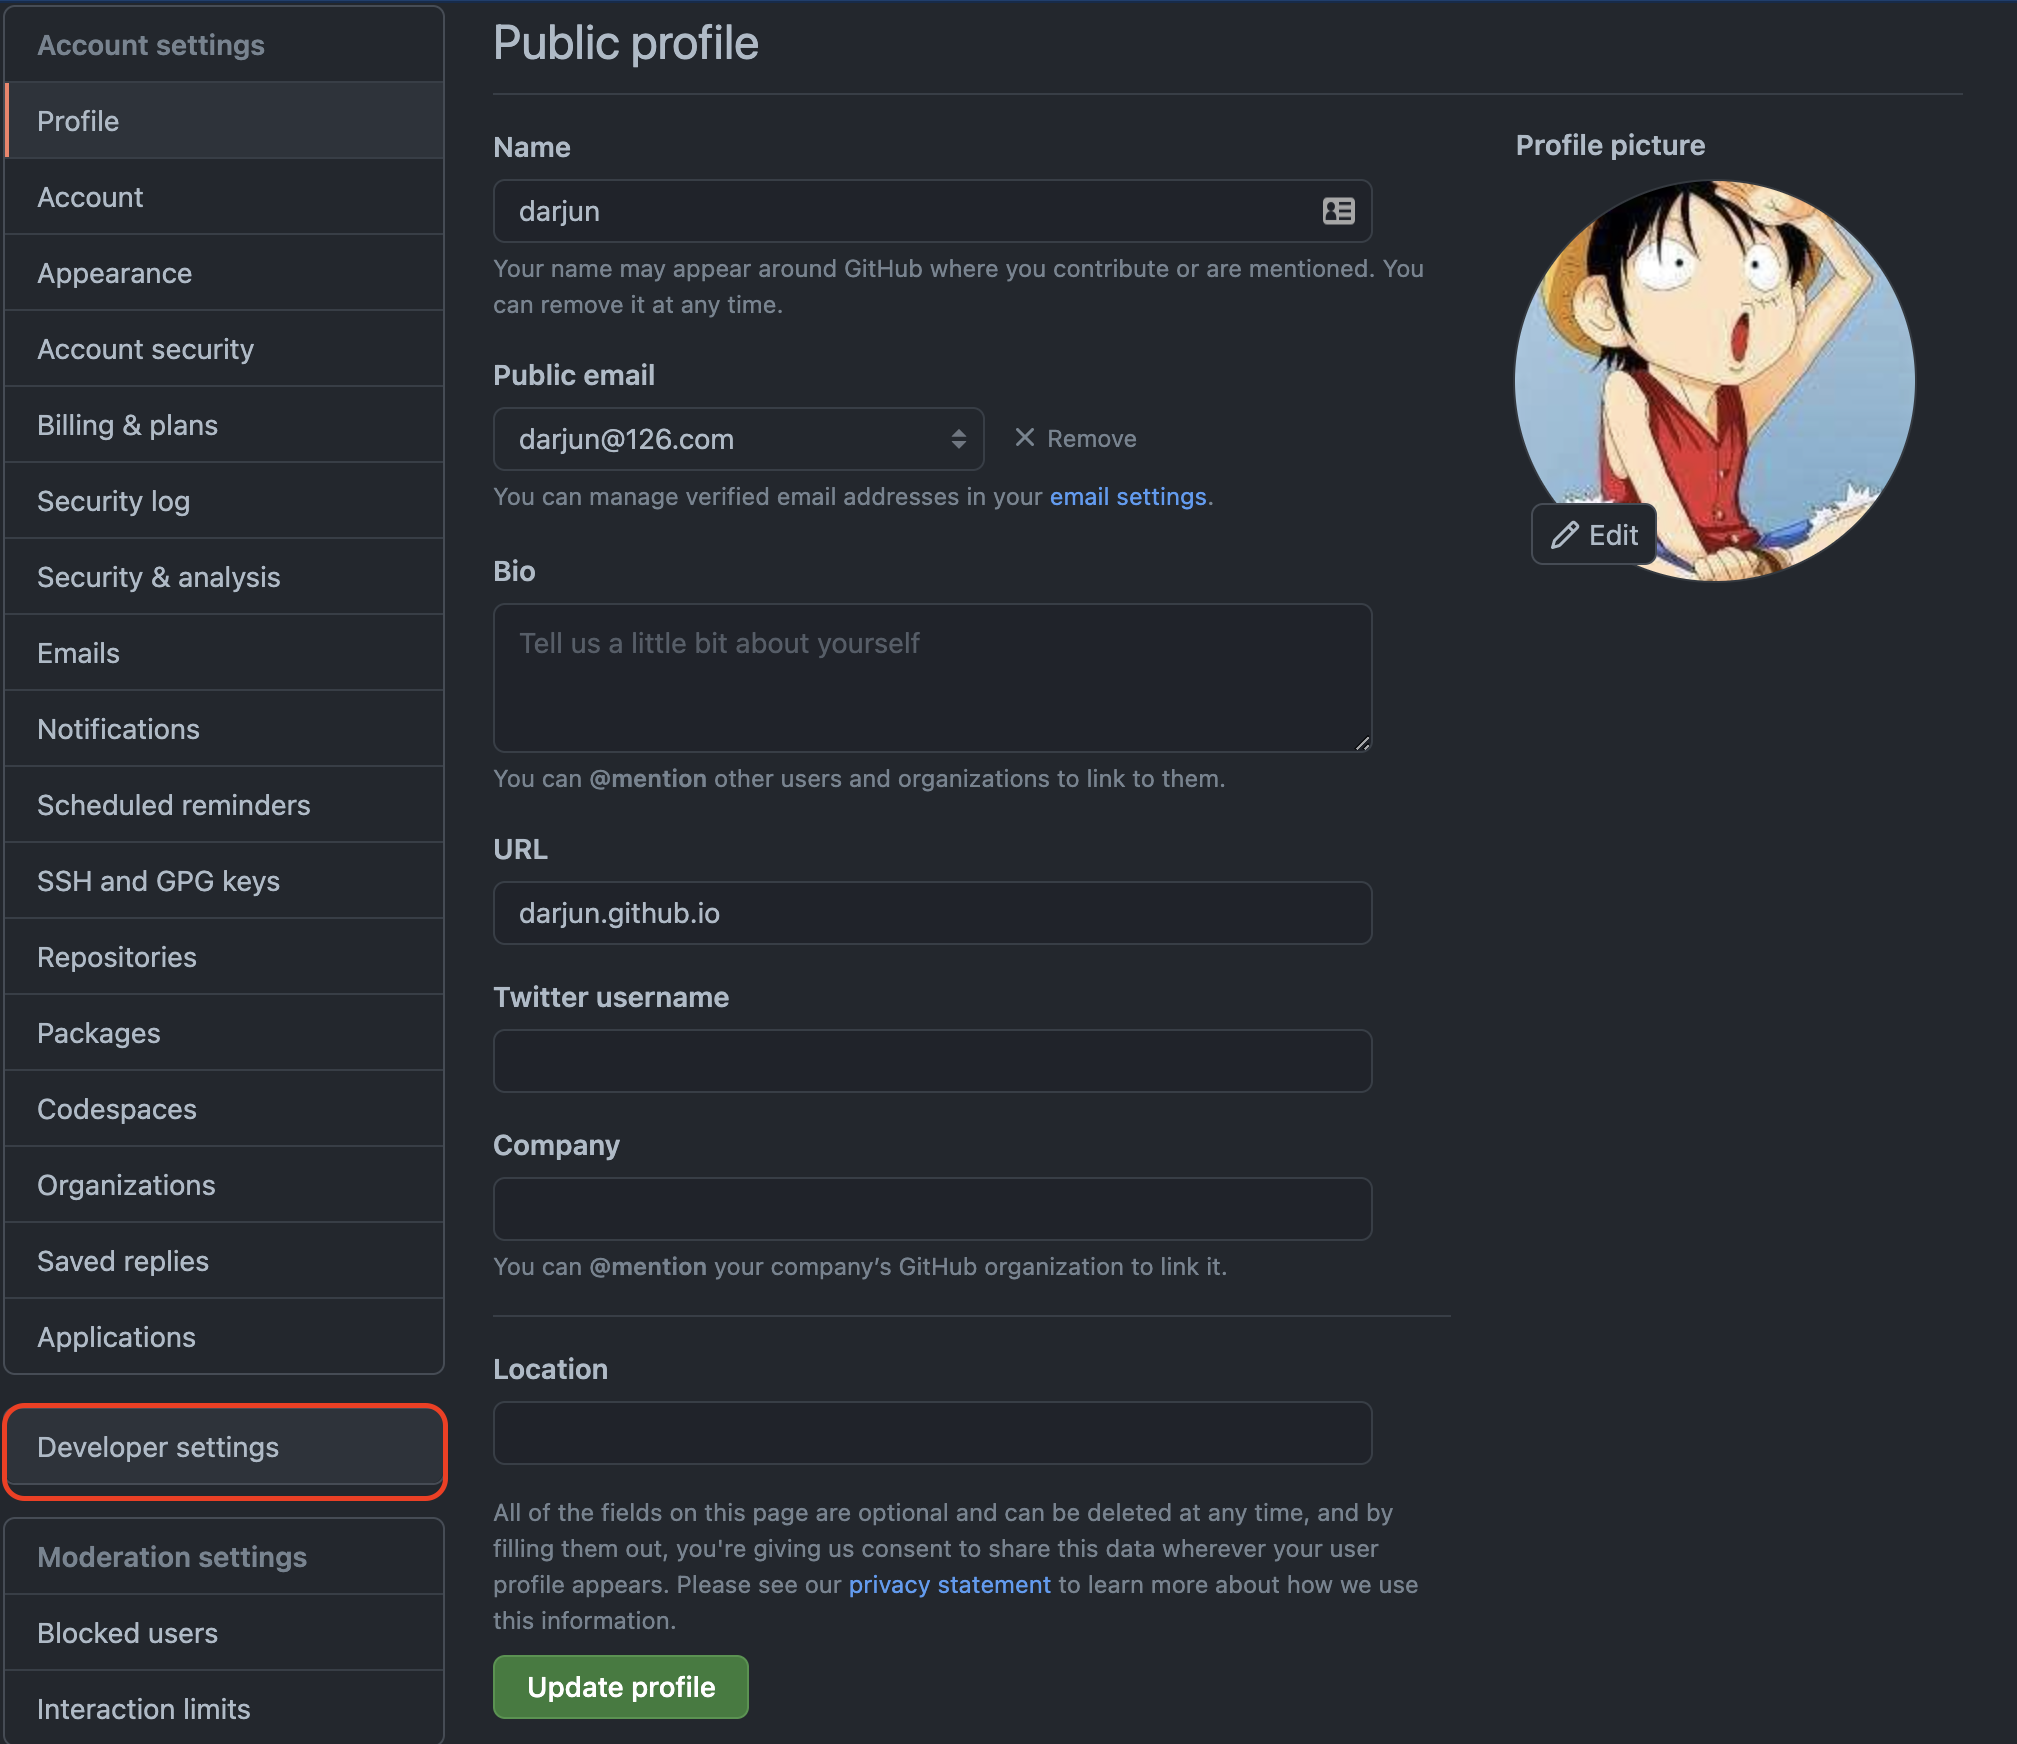
Select Personal access tokens, then click Generate new token in the upper right corner.

Fill in Note to indicate the purpose of the token, this can be filled in according to your situation. The following checkboxes are used to select which permissions the token has, and are not required here.
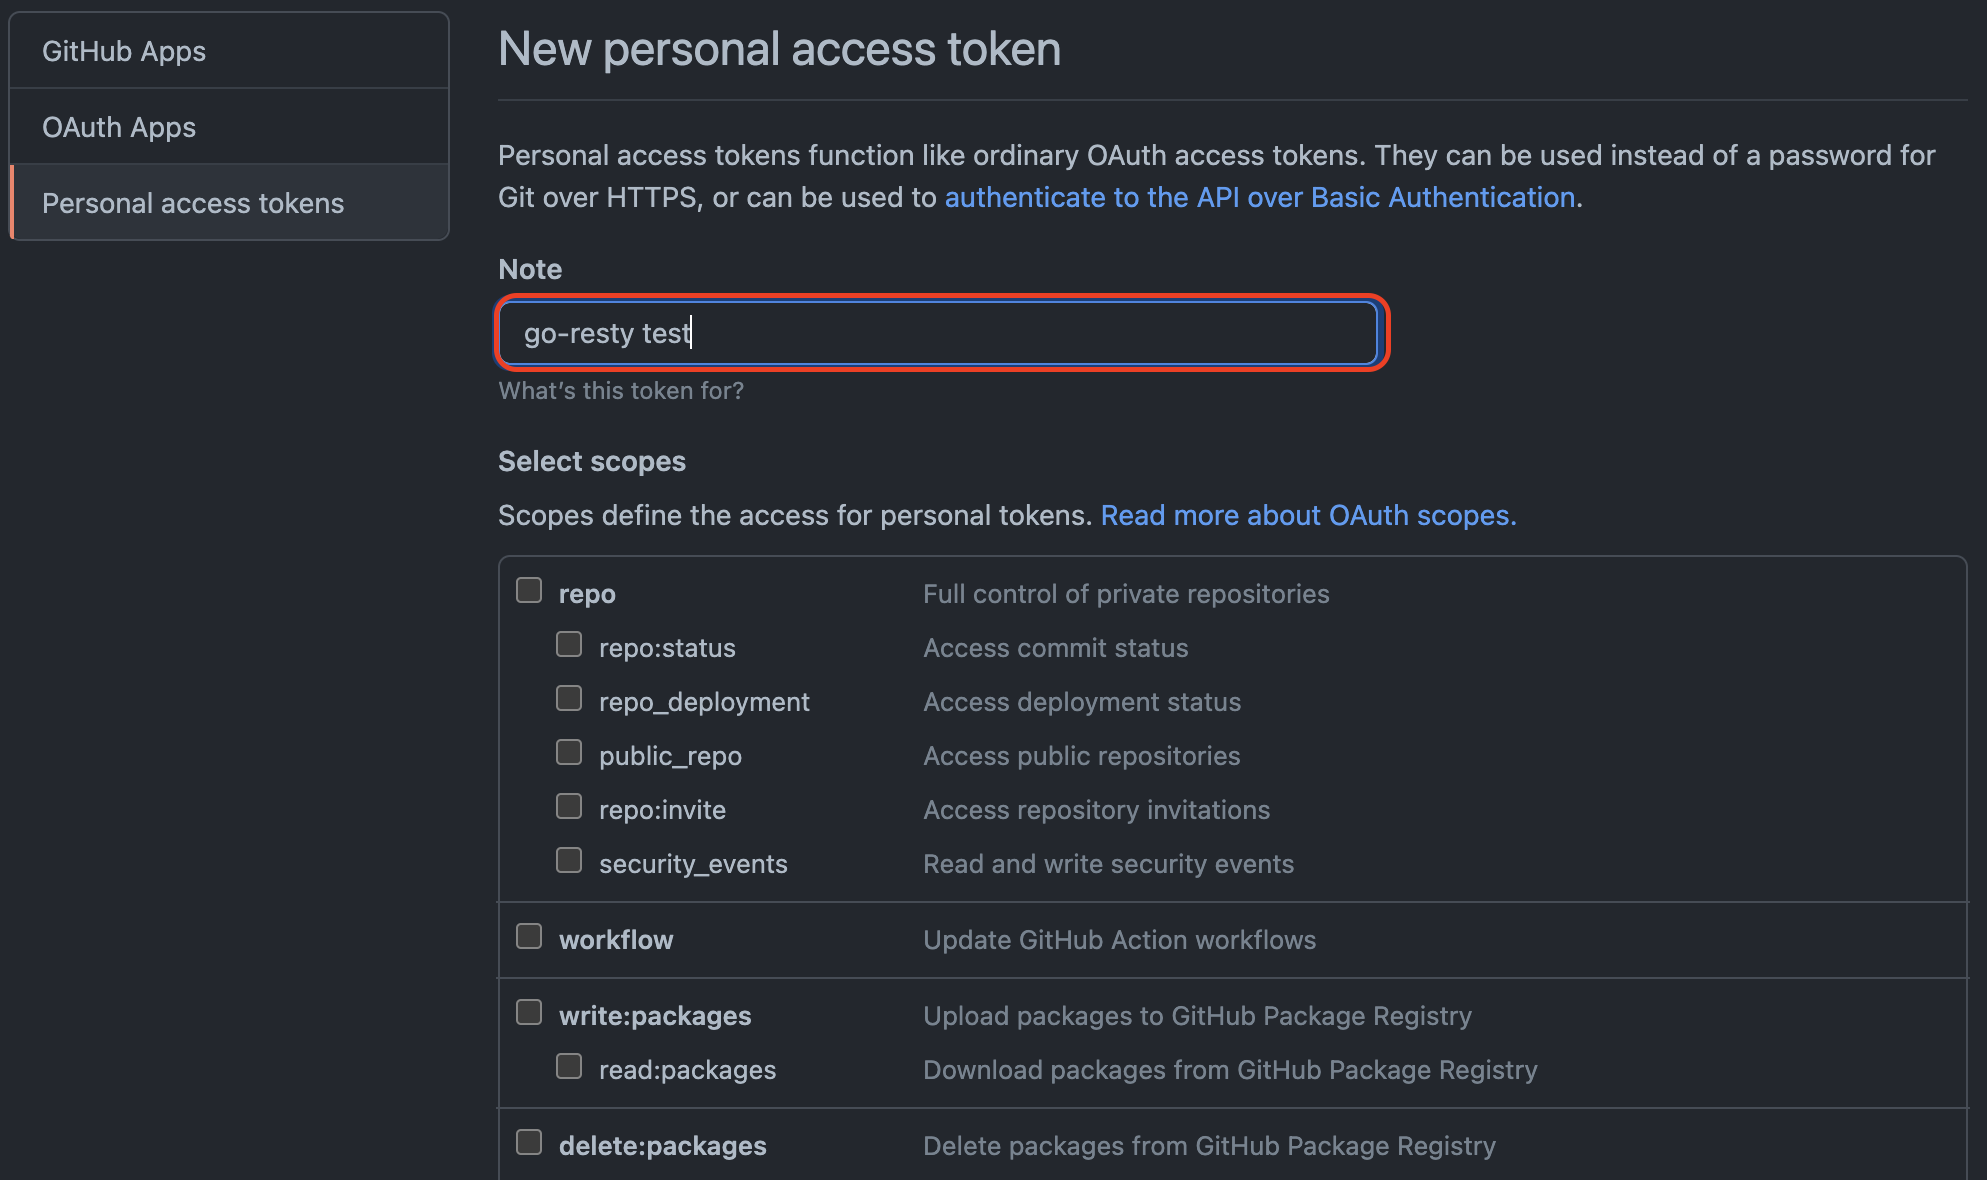
Click the Generate token button below to generate a token.

Note that this token can only be seen now, close the page and you won’t be able to see it next time you enter. So save it, and don’t use my token, I will delete the token after testing the program 😭.
The JSON format data in the response is shown below.
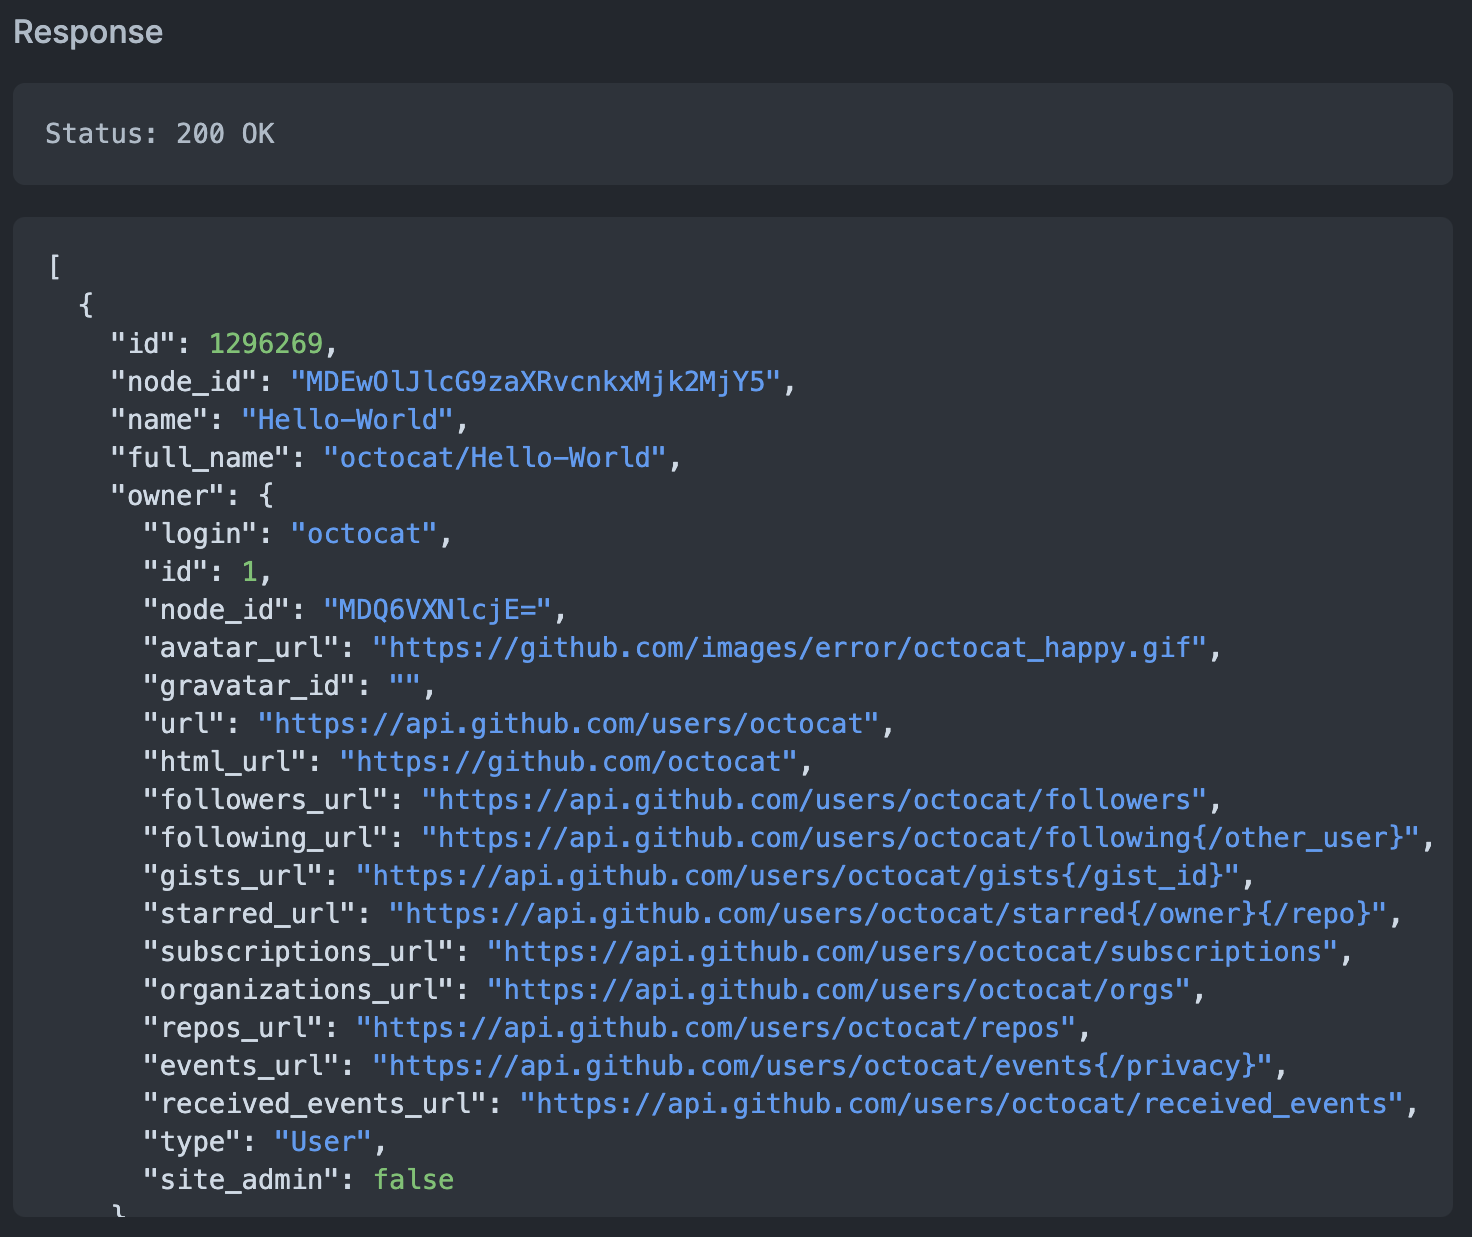
There are so many fields that for the sake of convenience I will deal with only a few here.
|
|
Then use resty to set the path parameters, query parameters, Header, Token, etc., and initiate the request.
|
|
The above procedure pulls the 3 repositories in ascending order of creation time.
Trace
After introducing the main features of resty, let’s take a look at a secondary feature provided by resty: trace. We enable trace by calling the EnableTrace() method on the request object. Enabling trace records the time taken and other information about each step of the request. resty supports chained calls, which means we can create the request, enable trace, and initiate the request all in one line: trace.
|
|
After completing the request, we get the information by calling the TraceInfo() method of the request object.
|
|
We have access to the following information.
DNSLookup: the DNS lookup time, if a domain name is provided instead of an IP, the corresponding IP needs to be looked up in the DNS system before subsequent operations can be performed.ConnTime: the elapsed time to obtain a connection, which may be obtained from a connection pool or newly created.TCPConnTime: the time taken for a TCP connection, from the end of the DNS query to the establishment of the TCP connection.TLSHandshake: TLS handshake elapsed time.ServerTime: server processing elapsed time, calculating the time interval from connection establishment to the time the client receives the first byte.ResponseTime: response elapsed time, the time interval between the reception of the first response byte and the reception of the complete response.TotalTime: the elapsed time of the whole process.IsConnReused: whether the TCP connection is multiplexed or not.IsConnWasIdle: whether the connection was fetched from an idle connection pool.ConnIdleTime: the connection idle time.RequestAttempt: the number of requests in the request execution process, including the number of retries.RemoteAddr: the service address of the remote, in IP:PORT format.
resty makes a very fine distinction between these. In fact resty also uses the functionality provided by the standard library net/http/httptrace. httptrace provides a structure where we can set the callback functions for each stage.
|
|
You can get a brief idea of what the callbacks mean from the field names. resty sets the following callbacks when trace is enabled.
|
|
Then, when fetching TraceInfo, the elapsed time is calculated based on each time point.
|
|
Run output.
|
|
We see that TLS consumes almost half of the time.
Summary
In this article I introduce HTTP Client, a very handy and easy to use library for the Go language. resty provides a very useful and rich API. Chain calls, automatic Unmarshal, request parameters/path settings are very convenient and useful, so that we can do our work with less effort. Due to the limitation of space, many advanced features can not be introduced one by one, such as submit form, upload files, etc., etc.. We can only leave it to those who are interested to explore it. 😄
Reference
- resty GitHub:github.com/go-resty/resty
- GitHub API:https://docs.github.com/en/rest/overview/resources-in-the-rest-api
Reference https://darjun.github.io/2021/06/26/godailylib/resty